10 Best Fly Fishing Jacket For You | Most Recommended

FLy Fishing Jackets

A fantastic day fishing starts with packing the right gear. While you can compromise on some gear, one thing you shouldn’t skimp on is your jacket. A good-quality fishing or wading jacket can mean the difference between a miserable, cold, and wet day versus a comfortable one, even in tough weather.
Not long ago, fly-fishing jackets weren’t very inspiring. They were like basic trash bags, lacking versatility. But now, they’re designed to be breathable, waterproof, windproof, and comfortable all day long, no matter what the weather throws at you.
These new jackets offer a lot of benefits, but understanding their features can be tricky when you’re trying to find the right one. Let’s talk about what makes a great fly fishing jacket, including the materials, what waterproofing means, and some recommendations for excellent jackets.

What Is Waterproofing, and Why Is It Important?


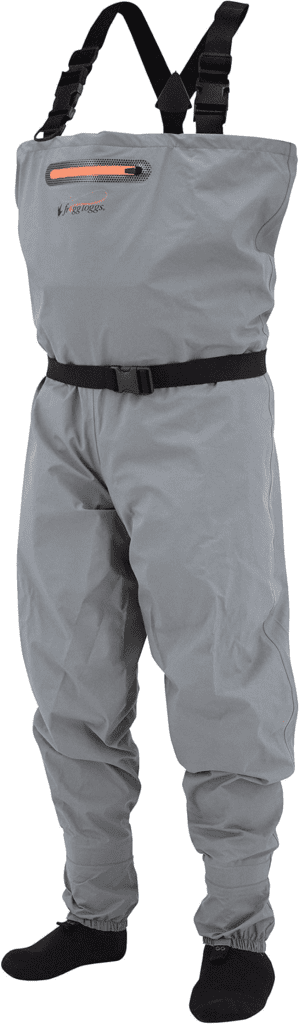
Staying dry is key in fly fishing, from head to toe. Just like your breathable waterproof waders, your jacket should also keep you dry. Let’s face it – the weather isn’t always perfect when you’re fly fishing. It can be cold, rainy, snowy, or involve a lot of splashing in rough waters.


Wading jackets are made to go over your waders, and they’re usually shorter than regular jackets to keep them from getting soaked while you’re wading. They’re made of breathable materials like nylon and polyester, which repel water while still letting you move freely to cast in the stream. Some jackets even have an extra layer of protection, like a polyurethane membrane, to make them even more water-resistant.


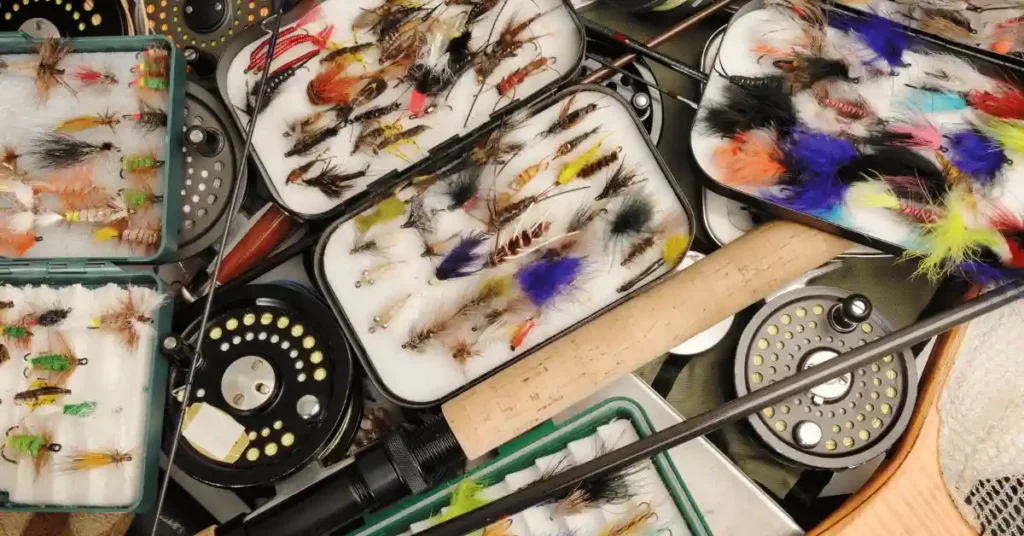
And to keep your stuff dry, wading jackets have pockets and attachments for your fly boxes, tools, nippers, and even waterproof pockets for things like keys and phones.

Choosing Your Fly Fishing Jacket: Soft Shell vs. Hard Shell


When picking a fly fishing jacket, a big decision is whether to go for a hard or soft shell.


Soft Shell Jackets:


Soft shells are for moderate weather, like cool temperatures. They’re not fully waterproof but resistant to water and wind. You can wear them alone or under a hard shell. Soft shells are lighter and let more air in.
Pros: Light, good for moderate weather.
Cons: It is not fully waterproof but is best for light rain.


Hard Shell Jackets:


Hard shells are tough, fully waterproof, and stop the wind. They don’t have an insulating layer. They’re durable but less breathable than soft shells.
Pros: Tough, suitable for heavy rain.
Cons: Not as breathable, stiff.


Understanding Jacket Layers:


Rugged shell jackets come in two, a half, and three layers.
Two Layers: Base material and waterproof part. It could be better for heavy rain.
Two and a Half Layers: Base, waterproof part, and a thin inner layer. Affordable and popular.
Three Layers: Base, waterproof part, and an inner liner for extreme conditions. It’s a bit pricey but super tricky.


Important Jacket Terms:


Ripstop: Stops rips from getting bigger, rigid material.
Denier: How heavy is the jacket? Higher is thicker but less flexible.
DWR: Coating for more waterproofing.
Seams and Seals: How the jacket is put together. Look for fully sealed zippers and seams.
Laminates or Coatings: Layers can be laminated or sprayed on. Laminated is better but costs more.
Cut and Size: Sizes can be different, so check the guide. Think about wearing layers underneath.
Fly Fishing Features: Look for pockets, clips, rings, and things that help with fishing. Fancy jackets for fishing have these extras.
Knowing these basics will help you choose a fly fishing jacket right for you!

10 Best Fly Fishing Jacket ( My top Picks)

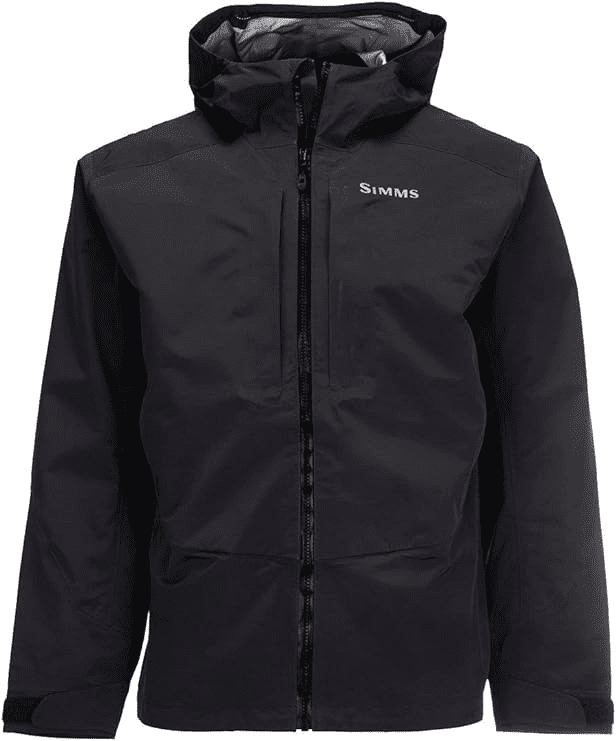
1. SIMMS G3 Guide Wading Jacket


Material: GORE-TEX 3-layer fabric for top-notch waterproofing and breathability.
Design: Articulated sleeves, adjustable storm hood, and secure cuffs for freedom of movement and weather protection.
Pockets: Large chest and handwarmer pockets for convenient storage.
Ventilation: Integrated underarm vents for enhanced breathability during active moments.
Durability: Tough and built to withstand rugged fishing conditions.
Extras: Adjustable hem and cuffs, fly patch, and D-ring for added convenience.
Purpose: Ideal for serious anglers seeking advanced protection and functionality.

Simms G3 Guide Wading Jacket is a great jacket to wear when you go fishing. It’s solid and durable because it’s made with three layers of a unique material called GORE-TEX, which keeps you dry and comfortable. The jacket is stretchy, so you can quickly move around when you’re fishing, rowing, or doing other activities.
This jacket has two big pockets on the chest—one for fishing gear and another for sunglasses or essential items. It also has pockets to keep your hands warm. Simms G3 is like a reliable workhorse that keeps water out and makes your fishing day enjoyable.

Pros

  • Advanced waterproofing and breathability.
  • Exceptional durability for rugged conditions.
  • Well-equipped with pockets and adjustable features.

Cons

  • Higher-end pricing may not be budget-friendly.
  • Slightly bulky design for those desiring a streamlined fit.

2. Simms Men’s Freestone Wading Jacket


Material: Toray 2.5-layer fabric for reliable waterproofing and breathability.
Design: Comfortable fit with an adjustable storm hood and ergonomic cuffs.
Pockets: Zippered chest and handwarmer pockets for easy storage.
Ventilation: Back venting for improved airflow during activities.
Durability: Sturdy construction to handle the demands of fishing.
Extras: Adjustable hem and cuffs for a personalized fit.
Purpose: Versatile jacket suitable for various fishing conditions, providing dependable protection and comfort.

Another good jacket for fishing is the Simms Men’s Freestone Wading Jacket. It’s made with a particular Toray fabric, which is like Gore-tex. This fabric keeps you warm and dry in different weather conditions. The jacket is rugged and well-built, with features like sealed seams and water-repellent zippers.
It has multiple pockets for storing your fishing equipment and valuables. The jacket is lightweight so that it won’t weigh you down, and it’s designed to keep you comfortable while you fish, no matter the weather.

Pros

  • Budget-friendly without sacrificing essentials.
  • Suitable for various conditions with ample storage.
  • Provides decent weather protection.

Cons

  • Fewer advanced features compared to premium models.
  • Potential trade-off in durability for affordability.

3. Skwala RS Jacket


Material: Advanced waterproof and breathable fabric for optimal performance.
Design: Tailored for comfort and ease of movement with a modern style.
Pockets: Thoughtfully designed pockets for practical storage.
Ventilation: Incorporated features for improved breathability in various conditions.
Durability: Durable construction to withstand outdoor challenges.
Extras: Adjustable elements for a customized fit.
Purpose: Versatile jacket suitable for different outdoor activities, offering reliable protection.

The Skwala RS Jacket is a standard for wading jackets. Even though it’s from a newer company, it’s known for being high quality. This jacket is more significant, so you can wear it over other layers and waders without feeling tight.

It’s built to withstand heavy rain and wind.
The RS Jacket is designed to be practical, with pull tabs for the hood inside the pockets to prevent them from catching on fishing lines. It keeps you warm, cuts the wind, and moves well with your body, making it a good choice for various activities like hiking and fishing. It’s a reliable jacket that gives you what you need for a great day outdoors.

Pros

  • Highly portable and lightweight for increased mobility.
  • Stylish design for aesthetic appeal.
  • Designed for comfort in warmer conditions.

Cons

  • Limited storage due to a streamlined design.
  • More specialized and suited for specific fishing conditions

4. Orvis Clearwater Wading Jacket

The Orvis Clearwater Wading Jacket is a smart choice for fishing without breaking the bank. It comes with useful features at a reasonable price. One cool thing is the D-ring, where you can attach your fishing net.

It means you don’t have to carry a heavy pack. You can easily slip this jacket over all your gear, allowing you to move around comfortably. It’s made of unique material that keeps you dry in the rain but lets your body breathe. And because it’s from Orvis, you know it’s made with excellent quality.

Pros

  • Designed for comfort during extended wear.
  • Various features without a premium price.
  • Cost-effective balance of quality.

Cons

  • Moderate durability compared to high-end options.
  • Not as advanced in extreme weather conditions.


5. Orvis Men’s Pro Wading Jacket


Check out the Orvis Men’s Pro Wading Jacket if you’re looking for a top-notch wading jacket. It’s designed to keep you protected while fishing. The jacket has three layers that stop water and let your body breathe, similar to the Simms jacket.

It keeps you warm when it’s cold and cool when it’s hot. There are zippers on the sides to release heat and adjust your waders. It’s a rugged jacket with an adjustable hood, a high neck for extra warmth, cozy handwarmer pockets, chest storage for your fishing gear, and a D-ring for your net. The tight wrist cuffs ensure you stay dry, especially when handling fish.

This jacket is built to last and has everything you need for a great fishing day.

Pros

  • Superior weather protection and durability.
  • Stylish appearance with functionality.
  • Equipped with advanced features for serious anglers.

Cons

  • Premium features come at a higher cost.
  • Extensive features may be more than necessary for some anglers.


6. Orvis Ultralight Wading Jacket


The Orvis Ultralight Wading Jacket is a fantastic choice for anglers who want something light and easy. This jacket is designed with feedback from anglers like you. It’s super soft, weighing less than 7 ounces, making it easy to carry in your bag or backpack.

When you need it, it’s there. The jacket even has unique cuffs that add more waterproofing when handling fish or reaching the stream. This jacket keeps you dry and protected with its three-layer shell, breathable nylon material, and strong zippers. No more wet sleeves after landing or releasing fish. It’s a reliable jacket that won’t weigh you down.

Pros

  • Lightweight design for enhanced mobility.
  • Versatile for various fishing conditions.
  • Weather-resistant features at a relatively affordable price.

Cons

  • Limited insulation for colder climates.
  • Some users may find it less durable compared to higher-end options.
Shop Now

7. Skwala Carbon Jacket


Skwala is a new player in fly fishing gear, and their Carbon Jacket, introduced in March 2022, is creating a buzz. Based in Bozeman, Montana, Skwala does things differently by making its fabric instead of using the common GORE-TEX.

The unique fabric has a four-way stretch, giving great flexibility, and the hydrophobic cuffs keep water away. Weighing less than a pound, this jacket has features suitable for various conditions. It’s not just for cold days; it also works well in warmer weather.

In colder weather, consider sizing up and layering for extra warmth; layer down in warmer months for better ventilation.

Pros

  • Exceptional durability and ruggedness.
  • Advanced features for serious anglers.
  • Comfortable fit and versatile for various conditions.

Cons

  • Limited storage due to streamlined design.
  • Specialized for certain fishing conditions.


8. Redington Wayward Guide Wading Jacket


The Redington Wayward Guide Wading Jacket is an excellent choice for fly fishing fans looking for a lightweight and durable option. Made from tough nylon, it has a unique technology, allowing air to flow out while keeping water and air from coming in.

The triple-layer outer shell strikes a balance between protection and breathability during casting. This jacket contains a chest storage pocket featuring water-repellent zippers, perfect for fly boxes. The addition of a fleece-lined neck and handwarmer pockets enhances comfort.

An adjustable hood and cuffs provide extra protection during adverse weather conditions. Whether cold or wet, this jacket mainly keeps you dry and comfortable throughout your fly-fishing adventures.

Pros

  • Affordable option with essential features.
  • Versatile design suitable for different conditions.
  • Durable build for rugged use.

Cons

  • Affordable option with essential features.
  • Versatile design suitable for different conditions.


9. Frogg Toggs Java Hellbender Fly & Wading Jacket


Be aware of its affordable price; the Frogg Toggs Java Hellbender is a reliable companion for fly fishing. It boasts essential pockets and storage systems, using DriPore Gen 2 technology for outstanding water resistance and breathability.

The jacket’s ultra-flexible and lightweight design ensures freedom of movement during casting. Well-thought-out features, including an adjustable hood and bill, show careful consideration in design. The full-zip front closure with a storm flap and rain gutter effectively keeps moisture out, providing a warm and dry environment for fly fishing.

Priced between $69 and $99, this wading jacket offers excellent value for money, delivering all the necessary features with thoughtful design. It’s a budget-friendly option that will satisfy you.

Pros

  • Budget-friendly option for entry-level anglers.
  • Decent weather protection.
  • Lightweight design for increased comfort.

Cons

  • Limited features compared to higher-end jackets.
  • May not withstand extreme weather conditions.


10. Simms Bulkley Insulated Jacket


Meet the Simms Bulkley Insulated Jacket, designed to tackle the harshest weather conditions imaginable. Lined with GORE-TEX inside and out, this jacket ensures you stay dry even in deep water.

The PrimaLoft insulation guarantees warmth, and Simms engineered the sleeves to prevent water from flowing up, even if you dip your arm in the river. This jacket is purposefully designed with fly boxes in mind, providing easy access to your essentials.

Suppose you’re looking for the ultimate combination of warmth and waterproofing. The Bulkley Insulated Jacket stands out as a top choice for discerning fly fishing enthusiasts.

Pros

  • Insulated design for cold weather.
  • Functional features for serious anglers.
  • High-end materials for durability.

Cons

  • Limited features compared to higher-end jackets.
  • May not withstand extreme weather conditions.

What to Consider When Choosing a Jacket


Breathability


When fishing in damp weather, it’s essential to consider breathability in a wading jacket. Breathability refers to how quickly the coat can release moisture from the inside to the outside without losing its waterproofing. Having a breathable and lightweight jacket is crucial in places like the Ozarks, where the temperature can change rapidly from 20 to 60 degrees. It helps expel extra heat and moisture, especially when it’s raining.


Water Resistance


Wading jackets are not like wet suits; they’re more like rain jackets. You may still get wet if you take a spill in the water. These jackets aren’t for complete submersion, so they can’t simultaneously expel large volumes of water. If you dip your elbow in the water while releasing a fish, you’ll be okay but don’t expect the jacket to protect you if you go for a swim. When choosing a jacket, look for good water protection around entry areas and features like an adjustable hood, wrist cuffs, and waist adjustments, as these areas are most vulnerable to water.


Wind Resistance


Wading jackets with water resistance usually also have wind resistance. It is crucial to stay warm and dry during fishing trips.


Mobility


Whether hiking to remote locations, in a drift boat, or casting all day, mobility in your wading jacket is essential. While insulation is substantial, finding the right balance to maintain mobility is critical. Adding base layers that can be removed later if needed is a good idea. Not all wading jackets alone can keep you warm on the water, so layering up provides the flexibility to adjust throughout the day.


Affordability


Getting into fly fishing can be overwhelming and expensive. However, there are wading jackets available for all budgets. Like other fly fishing gear, you can find a product that fits your financial constraints.

Kokanee Trolling Setup | Everything you Need To Know

Kokanee Trolling Setup

Did you know that having the right gear and tricks can make your fishing trip way more exciting? Imagine easily catching those tricky freshwater salmon called kokanee. I’ve spent tons of time perfecting how to catch them, and now I’m sharing my secrets with you!
From picking out the perfect fishing rod to choosing the best bait, we’ll cover it all. You’ll also learn cool stuff like how fast to go and how deep to fish for the best results.
Whether you’re already a pro or just starting, this guide will help you level up your fishing game. Get ready to become a kokanee-catching champ! and learn Kokanee Trolling Setup.

Understanding Kokanee’s Life for Awesome Fishing


The Big Start:

Kokanee Trolling Setup


Spawning Kokanee, which are like freshwater salmon, start their lives in a cool way. First, they head back to the streams where they were born to make babies. They swim hard against the water’s flow and even jump over obstacles like waterfalls!
During this time, the boy Kokanee gets all colorful and grows hook-like jaws to impress the girls. And the girls? They make nests in the gravel beds by digging with their tails and laying their eggs there.

New Life: Hatching


After the girl Kokanee lays her eggs, they hang out in the gravel for a bit. Then, they hatch into tiny fish called alevins. These little guys have see-through bodies with a yolk sac attached to them, kind of like a snack pack! They stay hidden until they finish munching on their yolk.
Once they’re done, they pop out of the gravel as fry, which is like their teenage phase. They’ve got cool stripes to blend in with their surroundings and hide from hungry predators.

Gear Up for Kokanee Fishing Success!

Source: Chrome Catcher


Top-Quality Gear for Reeling in Kokanee


Getting the right gear is super important for landing those tricky kokanee. For rods, reels, and lines, go for ones made just for kokanee fishing. They’re specially designed to handle these lively fish and give you the best chance of a catch.
Kokanee are known for their fancy moves once they’re hooked, so you need a rod with a sensitive tip to feel even the tiniest nibble. Look for rods made of lightweight stuff like graphite or fiberglass – they’re strong and bendy enough to handle the action. Pair it up with a reel that has a smooth drag system to keep that kokanee under control.


When picking out a fishing line, go for monofilament or fluorocarbon in lighter weights. A thin line helps your lures dive deep, right where the kokanee hang out. And using lines that are hard for fish to see can keep them from getting spooked.


Downriggers and Rod Holders: Your Fishing Buddies


To catch kokanee swimming at different depths, you need downriggers. They let you lower your lures to specific levels underwater, where the kokanee are chilling. Rod holders are handy too – they keep your rods safe while you’re waiting for a bite. With this setup, you can watch multiple lines at once without holding them all.


Tackle Boxes: Keep It Neat


Staying organized is key when you’re out on the water. Tackle boxes come in all shapes and sizes to fit your stuff. They help you keep your lures, hooks, and weights tidy and ready for action. Look for ones with lots of compartments to keep everything in its place and avoid tangles.
Choose the Perfect Rod, Reel, and Line for Kokanee Fishing


Get a Lightweight Rod with a Sensitive Tip


Choosing the right rod is a big deal. Look for a lightweight one with a sensitive tip – that way, you’ll feel every little nibble from those sneaky kokanee. Special rods made for kokanee fishing are extra responsive and perfect for sensing those gentle bites.


Reels with Smooth Drag Systems Keep You in Control


Picking the right reel is just as important. Kokanee might not be huge, but they can still put up a fight. You’ll want a reel with a smooth drag system to handle their fast moves without jerking the line. That way, you can keep steady pressure on the fish and avoid losing it.


Low-Stretch Line for Stealthy Fishing


The type of line you use is crucial too. Low-stretch monofilament lines are great for feeling subtle bites and giving you a bit of flexibility when you’re reeling in a kokanee. Fluorocarbon lines are awesome because they’re hard for fish to see underwater, keeping you stealthy and increasing your chances of a catch.

Nail Your Kokanee Fishing with Awesome Lures, Dodgers, and Bait Tricks!


Try Different Colors and Sizes of Lures


Picking the right lures is key to snagging those kokanee. These fish can be picky eaters, so it’s all about experimenting with different colors and sizes to see what they like best. Some anglers swear by flashy colors like pink or orange, while others go for more natural shades like silver or gold. By mixing it up, you’ll figure out what makes that kokanee bite!
For example: I’ve had a blast using bright pink lures with a hint of sparkle in my top fishing spot. Kokanee just can’t resist them!


Add Dodgers or Flashers to Amp Up the Action


Besides choosing the right lures, adding dodgers or flashers to your setup can seriously up your game. Dodgers are metal blades that spin in the water, catching the kokanee’s eye with their flashy moves. And flashers? They’re like shiny mirrors that reflect light underwater, drawing in those curious fish.
Imagine this: When you use a dodger or flasher with your lure, it’s like serving up an irresistible meal that Kokanee can’t say no to. They think it looks just like their favorite snacks, so they can’t resist taking a bite!


Boost Attraction with Scented Bait

Kokanee Trolling Setup


Kokanee have a super sense of smell, which they use to find food in lakes. To grab their attention, try using scented bait or adding bait scents directly to your lures. The extra smell will make those kokanee go wild and practically beg for a taste!
For example: I’ve had amazing luck using corn kernels or dough with a shrimp scent. The strong smell pulls in Kokanee from far away and keeps them interested long enough for me to hook one!

Mastering Downriggers and Electric Motors for Expert Trolling


Get the Hang of Downriggers for Perfect Depth


To become a pro at trolling for kokanee, you’ve gotta master using a downrigger. It’s like a magic tool that lets you control exactly how deep your lure goes. By attaching a weight to a cable connected to the downrigger, you can drop your line to just the right spot with ease.
First, make sure your downrigger is set up properly on your boat. Attach the weight to the cable using a release clip, then lower your lure or bait until it’s at the depth you want. Keep an eye on your sonar to make sure you’re on track, and adjust as needed.


Using an Electric Motor for Smooth Sailing


Electric motors are a game-changer when it comes to trolling. Unlike noisy gas motors, electric ones let you sneak up on fish without scaring them off. This is super important for kokanee, who can be spooked by loud noises.
To use an electric motor like a pro, just adjust the speed to match your trolling pace. It’s all about keeping things smooth and steady for the best chance at catching that elusive kokanee!

Get Your Kokanee Lures

Kokanee Trolling Setup


Master the Palomar Knot for Super Strength


First up, let’s talk about the Palomar knot – a must-know for any kokanee angler. It’s strong, easy to tie, and a real favorite among us fishing folks. Here’s how to tie it:

  • Double about 6 inches of your fishing line and thread it through the lure’s eye.
  • Tie an overhand knot with the doubled line, making a loop.
  • Pass the loop over the lure, letting it hang loose.
  • Take the loop end and pass it over the top of the lure again.
  • Moisten the knot, then pull both ends tight in opposite directions.


With this knot in your arsenal, your kokanee lures will stay snug and secure as you troll.


Say Goodbye to Line Twist with Swivels or Snaps


Line twist can be a real pain when rigging kokanee lures, but there’s a simple solution – swivels or snaps. These handy gadgets let your lures spin freely without tangling up your line.

All you need to do is attach a small barrel swivel or snap between your mainline and the leader. This little doohickey acts as a pivot point, keeping any spinning action below it and away from your mainline. Plus, it makes swapping out lures a breeze – just clip on a new one without fussing with knots!


Double Your Hooking Chances with Tandem Hooks


To really up your game when going after Kokanee, try a tandem hook setup. This trick lets you present two bait options at once, doubling your chances of a hookup. Here’s how to set it up:
Tie your leader line to the eye of the first hook using your favorite knot.
With this setup, you’ll have that kokanee hooked left, right, and center in no time!

Boost Your Kokanee Fishing Game with Electronics and Fish Finders!


Discover Kokanee Hotspots with Fish Finders


Fish finders are like your secret weapon for kokanee fishing. They help you find where the kokanee are hanging out and how deep they’re swimming. Using sonar, fish finders spot fish below the water’s surface.

But you’ve got to know what to look for to find those sneaky kokanee. Keep an eye out for features on your fish finder that signal kokanee. Look for multiple fish targets, which tell you there’s a school nearby. Knowing how many kokanees are in a group helps you tweak your fishing strategy for the best chance of catching them.

Some fancy fish finders even have GPS maps built in. Once you’ve found a Kokanee hotspot, mark it on your map for future trips. This saves you time and guarantees you’re always fishing in the right spot!


Tune Your Fish Finder for the Best Results


When fishing for kokanee in different water conditions, you’ve got to adjust your fish finder settings. Sensitivity is key here. It determines how well your fish finder picks up small objects, like kokanee.

In clear water, crank up the sensitivity to spot those faint signals from kokanee. But in murkier water with more clutter, lower the sensitivity to cut through the noise and get a clearer picture. Experiment with different settings until you find the sweet spot for spotting kokanee.


Prepare for Kokanee Fishing Success


Do Your Lake Homework


Before you hit the water for kokanee, do some homework on the lake or reservoir you’re fishing. Each place has its quirks that affect where Kokanee hangs out.

Find out about the depth, temperature, and structure of the lake to pinpoint where the kokanee might be. Knowing their habits, like where they like to chill during spring, boosts your chances of hooking a big one. Check out local forums or chat with experienced anglers for insider tips on the best spots and techniques.


Know the Rules and Get Your Permits


Don’t forget to check the rules before you cast your line. Every area has its fishing regulations, like how many kokanees you can catch or if there are size limits. Make sure you’re up to speed to keep your fishing trip legal and fun. And don’t skip getting your permits or licenses! It’s a must before you head out on the water. Breaking the rules can spoil your day and harm the kokanee population.


Pack Like a Pro for Comfort and Success


To make your kokanee fishing trip a breeze, pack the essentials. Start with weather gear—sunscreen is a must for sunny days, and polarized sunglasses help you see beneath the water’s surface.

Dress in layers to stay comfy all day. Breathable fabrics keep you cool, while waterproof layers keep you dry if it rains. With the right gear, you’ll be ready for whatever the day throws at you!

Ace Your Kokanee Trolling with These Winning Strategies!


Mix Up Your Speed and Depth


Variety is the spice of successful kokanee trolling! These fish love a bit of variety in their bait presentation, so don’t be afraid to switch things up. Start by trolling at a moderate speed, around 1.5 to 2 miles per hour, and see how it goes. If the bites aren’t coming, try slowing down or speeding up a tad until you find what works.

The same goes for depth—experiment with different levels in the water column using downriggers or lead-core lines. By tweaking your speed and depth, you’ll cover more ground and give those kokanee plenty of enticing options to consider. It’s all about adapting to what the fish want and increasing your chances of a strike!


Keep an Eye on the Weather


Weather plays a big role in kokanee behavior, so it’s essential to stay clued in. On sunny days, kokanee tend to hang out in deeper waters to stay cool and safe from predators. Drop your baits deeper or switch to attractors that mimic sunlight reflections to draw them in. But when it’s cloudy or overcast, kokanee might move closer to the surface in search of food. Raise your baits higher in the water column to meet them where they’re feeding. Remember, patience is key!


Stay Patient and Persistent


Kokanee can be tricky customers, so don’t expect instant results. Sometimes they’ll tease you by following your bait without biting, or they’ll only nibble for short bursts. Don’t lose heart! Stay focused and keep trying different tactics.

Persistence pays off in the end. In Conclusion…


We’ve covered a lot in this guide to kokanee trolling, from understanding their behavior to choosing the right gear and mastering techniques. By putting these strategies into practice, you’ll be well-prepared for your next kokanee adventure. So, grab your gear, hit the water, and get ready for some thrilling kokanee trolling action. Happy fishing! FAQs for Kokanee Fishing Success


Wondering about the best trolling setup for kokanee fishing? Opt for a lightweight rod and reel combo with a sensitive tip, paired with a 6 to 8-pound test monofilament or fluorocarbon line. Use dodgers or flashers with small lures or bait for added attraction. Curious about using downriggers effectively?

Set them at various depths based on your fish finder readings and adjust your boat speed to match the kokanee’s feeding preferences. Need to know which knots are essential for rigging kokanee lures? Master the improved clinch knot for attaching lures to your mainline and the double loop knot for connecting dodgers or flashers.

Can fishfinders help you locate schools in kokanee? Absolutely! Look for steep drop-offs and underwater structures on your fish finder screen to pinpoint kokanee hotspots. Preparing for a successful kokanee trip? Check local fishing regulations, get the necessary permits, and pack essentials like sunscreen, polarized sunglasses, and layered clothing for comfort and protection.

12 Best Fly Fishing Waders For You In 2024

best Fly fishing Warders

Fly fishing waders are an essential thing to consider when you’re into fishing. They are like unique pants that keep you dry and warm when fishing, especially in colder weather. They’re essential for safety; having the right ones can improve your fishing day. Even though they can be expensive, they are necessary for this sport.

When choosing the best fly fishing waders, you must consider more than just the price and safety. How durable they are, how comfortable they are if they keep you warm, and what you will use them for.


I tried out some of the best fly fishing waders available to make it easier for people to choose. I used them myself and talked to experienced guides and experts in the fishing industry.

I made a list of the best options for people of all skill levels to have a safer and drier time when fishing.
But what exactly are waders? Waders are super important when you go near the water. They keep you dry and warm and protect you from things like bushes, animals like snakes, and bugs.


If you’re really into fly fishing and want to keep doing it, a good pair of waders is worth the money. You might only realize their importance once you have a terrible experience, like if they leak and your trip is ruined.

Depending on where and how you fish, you can choose different waders, like ones that go up to your chest or just to your waist, ones made of other materials, and ones with remarkable feet or boots. If you need clarification on what all these terms mean, don’t worry. We’ll explain everything in this article.


If you only fish in warm places, you might not need waders. You can do something called wet wading instead. But for that, you need warm water and air temperatures.

The Following are 12 best warders i have choosen after using and reviewing them.

12 Best Fly Fishing Warders (My Picks)

1. Best Overall: Simms G3 Guide Waders

Key Features:
Material
: 3-layer GORE-TEX® for top-notch waterproofing.
Durability: 4-layer GORE-TEX® Pro Shell in high-wear areas.
Fit: Articulated design, adjustable suspenders for comfort.
Protection: Gravel guards, reinforced seat, and knees.
Convenience: Zippered chest pocket, built-in retractor for tools.


Simms takes the lead in the industry when it comes to fishing waders. The G3 Guide Waders from Simms stand out for several reasons. One notable improvement is the addition of air mesh suspenders, which are much more comfortable than the solid fabric suspenders found in older models.

Simms also made the waders more comfortable with a 3-layer Gore-Tex fabric in the upper section and increased durability with a 4-layer Gore-Tex material in the lower section. It makes the waders more breathable, comfortable, and resistant to tears and punctures.
Simms is known for focusing on solving problems and enhancing the angling experience with their products. One minor but significant update on the G3 is the removal of lace hooks on the built-in gravel guards. These hooks, commonly found on many waders, often cause issues with fly lines and create constant problems. The G3 eliminates this hassle.
The waders have additional features such as zippered and fleece-lined side pouches and an exterior fly patch, making them an excellent choice for dedicated recreational anglers. While they may not be the most expensive or the cheapest option on the market, the Simms G3 Guide Waders offer the best all-around quality for anglers seeking high-end performance without breaking the bank.

Pros

  • Exceptional durability and ruggedness.
  • Advanced features for serious anglers.
  • Comfortable fit and versatile for various conditions.

Cons

  • Higher price point.
Shop now

2. Best Rugged: Orvis PRO Zipper Waders

Key Features:
Material
: Tough 4-layer Cordura® shell for durability.
Design: AQUASEAL® zipper, convertible to waist-high.
Tool Dock: Integrated dock for quick tool access.
Comfort: Anatomical neoprene booties for a secure fit.
Adjustability: Customizable suspenders with low-profile buckles.
Storage: Multiple pockets, including large chest and internal.
Protection: Gravel guard with molded boot hook.


The Orvis PRO Zipper Waders stand out for their rugged design, providing a feeling of durability akin to wearing a suit of armor. Although they may not be as supple and comfortable as other top-tier waders, the PRO Zippers are durable.

Tested in harsh conditions like winter fishing in Virginia’s freestone rivers and spring creeks, these waders withstand abuse, including encountering thorn bushes and rocky banks, without developing leaks or punctures.
One standout feature of the PRO Zippers is the TIZIP Masterseal waterproof zipper, offering convenience and a level of protection not found in many other waders. The waders also come with removable OrthoLite X25 knee pads, providing additional comfort and safety for navigating rugged terrain. Two zippered and fleece-lined pockets on each side offer warmth and storage, while the front zippered pockets can hold smaller items or tippets.
Although the Orvis PRO Zippers may have a higher price point, they justify it with their durability, unique features, and comfort-enhancing elements. Suppose you’re searching for high-quality waders that endure rugged terrain and constant use. In that case, the Orvis PRO Zipper Waders are an excellent choice.

Pros

  • Robust and durable construction.
  • Advanced zipper design for easy on/off.
  • Suitable for challenging environments and rugged use.

Cons

  • Premium pricing.
Shop now

3. Best Newcommer: Grundéns Boundary Zip Stockingfoot

Key Features:
Innovation
: Newcomer with innovative design and features.
Material: Durable and breathable for all-day comfort.
Convenience: Zip stockingfoot for easy wear and removal.
Versatility: Suitable for various fishing conditions.


The Grundéns Boundary Zip Stockingfoot is a brand-new option for 2023. It’s always a bit unsure when a new brand jumps into making waders, but Grundéns has a good track record in making waterproof gear for a long time.

Their new waders come with a zipper (shown above) and a regular chest version for both guys and girls. These waders are made from Gore-Tex fabric, which is good because it breathes well and is challenging. They’re like the Simms G3 and G4 waders, feeling similar and brutal.

One cool thing is the booties on these waders—they have two layers that keep your feet warm by reflecting your body heat.
So far, the Grundéns Boundary Zip Stockingfoot seems promising. I’m excited to try them out a lot this season to see if they have any issues. If you’re okay spending some money, these waders seem like a good choice for good quality that will last a long time.

Pros

  • Innovative newcomer to the market.
  • Quality construction with attention to detail.
  • Zipper design for convenience.

Cons

  • Limited track record compared to more established brands.
Shop now

4. Expensive Pick (Over $500): Orvis Men’s Pro

Key Features:
Breathability
: Exceptional breathability for extended wear.
Material: High-quality fabric for comfort and durability.
Design: Thoughtful design for optimal ventilation.
Performance: Ideal for anglers prioritizing breathability


The Orvis Men’s Pro waders are meant to be used extensively over many years. The bottom part of these waders, from your thighs down, is made of a rigid material called a 5-layer Cordura shell to resist scratches. The Orvis Men’s Pro waders also have knee pads that you can take off to move around more easily.

They’ve got many pockets—some with zippers, a flap-out one, and even pockets to warm your hands in any weather.
These waders have stretchy suspenders that let you quickly turn them into waist-high waders. And they come with a good warranty from Orvis, so you know they’re built to last.

Pros

  • Highly breathable materials for comfort.
  • Designed to regulate temperature in various conditions.
  • Suitable for long hours of wear.

Cons

  • Premium pricing.
Shop now

5. Best Everyday: Simms G4Z Guide Waders

Key Features:
Versatility
: Perfect for everyday use in diverse conditions.
Material: Advanced fabric for durability and comfort.
Fit: Designed for ease of movement and all-day wear.
Features: Comprehensive features for daily angling needs


The Simms G4Z Guide Waders are like an upgraded version of the G3 series. It has a particular Gore-Tex fabric—3 layers on top and four on the bottom. It makes them strong and protects them from poking things.

What’s remarkable is they’re not just strong but also super comfy. The feet part is molded to fit well, and special seams make it easy to move around without tearing anything.
These waders have a zipper in the front for easy access and big pockets on the chest for your stuff. Guides who spend much time on the water like these waders because they’re comfy and last a long time.

Pros

  • Comfortable for extended wear.
  • Durable construction for everyday use.
  • Versatile for a range of fishing scenarios.

Cons

  • Higher price point.
Shop now


6. Best New Design: Patagonia Swiftcurrent Expedition Zip-Front Waders

Key Features:
Expedition
-Ready: Designed for challenging fishing expeditions.
Durability: High-quality materials for rugged environments.
Comfort: Engineered for comfort during long fishing sessions.
Versatility: Suitable for a range of fishing conditions


They are introducing the new Patagonia Swiftcurrent Expedition Zip-Front Waders, which replace the popular Patagonia Rio Gallegos waders. These waders are made to fit better with cool upgrades like a new flexible crotch for more movement, bendable legs, and an easier-to-adjust suspender system.

The better-fitting lower-volume booties have a warm quilted inside, and you can pick from 19 sizes to find your perfect fit.
Patagonia uses a new 4-layer fabric made from recycled materials for these waders. It has a particular waterproof/breathable layer and a finish that keeps water away. The improved YKK waterproof front zipper is more robust.

The waders have many pockets, including two inside drop-in pockets, a fold-out waterproof zippered pocket, two chest pockets, and two handwarmer pockets. They even come with detachable knee pads, handy for kneeling on rocky stream bottoms.

Pros

  • Expedition-grade features for challenging conditions.
  • Patagonia’s reputation for quality.
  • Thoughtful design for comfort and functionality.

Cons

  • May have more features than needed for casual anglers..
Shop now

7. Best Under $300: Simms Tributary

Key Features:
Affordability
: Best value for budget-conscious anglers.
Quality: Simms reliability at an accessible price point.
Material: Durable construction for cost-effective performance.
Functionality: Essential features for a practical fishing experience.

The Simms Tributary series is a good pick for those who want affordable options under $300. Though less fancy than pricier waders, these are durable and keep you dry. It has a 3-layer waterproof polyester upper and 4-layer lower, and Simms’ quality tailoring makes it stand out.

The warm fleece-lined pocket on the chest is great for your hands, and built-in guards prevent rips and tears.
Storage space is limited, but the front chest pocket with a zipper has enough room for fly boxes and essential gear. The simplicity of these waders is excellent compared to fancier ones. Simms Tributary waders are perfect for easy wading or quick trips where you only need a bit of gear.

Pros

  • Affordable pricing for a reputable brand.
  • Decent durability for the price.
  • Provides essential features for budget-conscious anglers.

Cons

  • May lack some advanced features of higher-end models.
Shop now


8. Best Durability: Simms G4 Pro

Key Features:
Durability
: Exceptional strength and longevity.
Material: GORE-TEX® Pro for top-tier performance.
Reinforcement: Strategic design for high-wear areas.
Reliability: Built to withstand rugged fishing conditions.

For those who want the toughest waders regardless of cost, the Simms G4 Pro waders are the best choice. Made from 3-layer GORE-TEX Pro Shell upper/4-layer GORE-TEX Pro Shell lower, they are sturdy. The comfy molded stocking feet and great suspender system with a secure waist belt make them top-notch.

The fleece-lined pockets are perfect for chilly days. The Simms G4 Pro also comes with a front zipper option for extra comfort in the Simms G4Z Pro version. No matter which one you go for, the Simms G4 waders will be reliable for a long time.

Pros

  • Designed for long-lasting performance in challenging conditions.
  • High-quality materials and construction.
  • Exceptional durability and ruggedness.

Cons

  • Higher price point.
Shop now

9. Best Style: Patagonia Men’s Swiftcurrent

Patagonia Men's Swiftcurrent

Key Features:
Aesthetics
: Stylish design for a fashionable angling look.
Quality: Patagonia craftsmanship with attention to style.
Comfort: Blends fashion with functionality for versatility.
Versatility: Ideal for anglers who appreciate aesthetic appeal.


Meet the versatile Patagonia Men’s Swiftcurrent, a fantastic pair of fly fishing waders. Thanks to Patagonia’s EZ-lock suspenders, you can quickly turn them into waist-high waders on warm days.

The zippered chest pockets, an inside flip-out pocket, and convenient reach-through handwarmer pockets offer plenty of storage options. These waders are crafted from 100% recycled polyester microfiber H2No® Performance Standard shell and come with scuff guards around the ankles for added abrasion resistance.
The anatomical booties of the Patagonia Swiftcurrent ensure comfort throughout the day. Weighing only 45.9 oz (1301g), they are an excellent choice for those who travel frequently. They are also available as zip-fronts for added convenience.

Pros

  • Suitable for those who value both style and functionality.
  • Stylish design with a modern aesthetic.
  • Patagonia’s commitment to quality.

Cons

  • Premium pricing.
Shop now

10: Best for the Money: Frogg Toggs Canyon II

50

Key Features:
Affordability
: Budget-friendly with excellent value.
Features: Practical features for a cost-effective option.
Durability: Solid construction without breaking the bank.
Overall Value: Best choice for budget-conscious buyers.


The Frogg Toggs Canyon II is complex to beat if you’re looking for a budget-friendly option. Particularly suitable for beginners or those who use waders sparingly, these waders are an excellent value for the money. As shared by Scott Einsmann, who doesn’t need chest waders frequently, the Canyon IIs met his requirements at around $130.

He used them for a Salmon River trip and winter trout fishing without any leaks or problems.
The comfortable shoulder straps and breathability to prevent sweating during hikes into un-pressured waters make the Canyon II a practical choice. While it lacks some features of premium waders, such as extra pockets, reinforced knees, and a refined fit, it serves its purpose well.

Keep in mind that layering is necessary in cold water. If your fishing style doesn’t demand those extra features, or if you’re starting, the Frogg Toggs Canyon II waders will fulfill your needs nicely.

Pros

  • Provides essential features for its price.
  • Good value for money for entry-level anglers.
  • Budget-friendly option with reasonable durability.

Cons

  • May not have the advanced features of higher-end models.
Shop now

11. Best Verstile: Orvis Clearwater Wader

Key Features:
Balance
: Quality performance at a reasonable price.
Material: Durable construction for everyday use.
Fit: Comfortable design for extended wear.
Versatility: Suitable for various fishing conditions.


Let me introduce you to the new Orvis Clearwater Wader – it’s designed to fit better and let you move quickly without feeling too bulky. Plus, it comes in an excellent light gray color called ‘Stone.’ The material is unique – four layers of waterproof and breathable nylon fabric that’s light but strong. Unlike other waders, Orvis tells you exactly how good it is: 30K for waterproofness and 8K for breathability. Simply put, it keeps you dry and comfy without needing a big brand name.
The Clearwater Wader is not just good-looking; it’s practical, too. The suspenders have unique buckles, so you can make the top part smaller for warm days when you only need it up to your waist.

The booties for your feet fit well, and there are low gravel guards, so they don’t slow you down. There’s also a pocket you can put your hands through to keep them warm and a pocket on the chest with a stretchy panel.
What’s even better is Orvis stands by their waders with a fantastic guarantee: if you’re not happy or if something goes wrong in the first 60 days, they’ll replace or refund your waders without any fuss. After that, if there’s regular wear and tear or damage, they can fix them for a fair cost so that you can get back to fishing.

Pros

  • Comfortable fit for extended wear.
  • Versatile design suitable for various fishing conditions.
  • Balanced combination of quality and affordability.

Cons

  • Moderate weather protection compared to higher-end models.
Shop now


12. Redington Sonic-Pro Waders

Key Features
Performance
: Reliable performance at an affordable price.
Material: Quality construction for durability.
Design: Thoughtful design for optimal functionality.
Affordability: A cost-effective choice without compromising quality


Lastly, let’s talk about the Redington Sonic-Pro Waders, which are like an upgraded version of Redington’s popular middle-range waders. The new Sonic-Pro Stockingfoot Waders have seams that are welded together (not sewn), and they come in four layers with extra strength in the lower legs and backside.

It makes them great if you sit in a boat or on rocks. There are pockets to keep your hands warm, a pocket with a zipper in the front, and a pocket inside that you can flip over for your small fishing tools.

Pros

  • Good durability for the price
  • Offers essential features for anglers on a budget.
  • Versatile design for different fishing scenarios.

Cons

  • May not have the advanced features found in higher-end models
Shop now


Is Fly Fishing an Art? Lets Find Out

is fly fishing an Art

Is Fly Fishing an Art? Lets Find Out

is fly fishing an Art

Is fly fishing an art? Well, let me ponder that for a moment. Art, to me, involves creativity, beauty, and emotion.

When I fly fish, I definitely need to get creative—finding the perfect spot, choosing the right fly, it’s all part of the artistry. And there’s no denying the emotional rush when I hook a big one.


Art often emerges from conflict, like when I battle with other anglers for the best spot, or when I’m up against hunger while trying to catch dinner.

Fly fishing is a challenge, both mentally and physically, pushing me to test my skills and determination against the elements.


When I take on fly fishing, I’m embracing a world of conflict. Will I succeed in landing that trophy fish? It’s all part of the artistry of the sport, and I’m eager to see how it unfolds.

You might be wondering how fly fishing can be considered creative. Well, let’s see. Picture yourself standing by the river bank, with the fishing rod in your hand and the water in front of you rippling and glistening under the sun. Here, creativity enters the game.


Choosing the right fly to use is one of the first ways creativity comes into play. As a fly fisher, I must study the environment, observe what insects are hatching, and then decide which fly to use.

is fly fishing an Art

Each choice is a miniature act of creation, influenced by the current season, time of day, and local ecosystem.


Then comes the art of casting. Watching a fly fisher’s cast, you’ll see a delicate balance between power and grace, between precision and fluidity.

I think of it as painting invisible strokes in the air, creating a unique rhythm and pattern with each cast.


Additionally, many fly fishers also indulge in the craft of tying their own flies. This, in itself, is a separate art form. A beautifully tied fly, with its intricate patterns and color combinations, is as much a work of art as any painting or sculpture.

It requires skill, patience, and a detailed understanding of both art and nature.


In essence, the art of fly fishing is not just about making a cast or selecting a fly. It’s about understanding and engaging with the surrounding environment in a creative way.

It’s about using creativity to problem-solve, to strategize, to express oneself. So yes, fly fishing indeed calls upon our creative minds, making it not just a sport, but a form of art as well.

The artistry in fly fishing becomes incredibly apparent when you witness the beauty it encapsulates. As I stand by the riverside, I can’t help but feel a sense of awe as I take in the breathtaking view.

The way the sunlight glimmers on the surface of the water, the delicate flutter of the fly as it dances above the water, the graceful arc of the fishing line as it sails through the air—there’s a natural beauty in every element that truly captures the spirit of this practice.


In my eyes, the art of fly fishing is a celebration of nature’s beauty. As a fly fisher, you become part of this living painting.

Your movements, the casting of the line, and even the anticipation of the bite become harmonious elements woven into the grandeur of nature’s canvas. The appreciation of this beauty is subjective, much like how we perceive different forms of art.

is fly fishing an Art

For some, it might be the quiet serenity of the water, for others, it might be the dramatic play of shadows and light on the river surface.


But beyond the visual aesthetics, the true beauty of fly fishing lies in its ability to create an emotional connection. It elicits a sense of peace, fulfillment, and even excitement that’s as captivating as any landscape or masterpiece.

It’s not just about the picturesque scenes or the thrill of catching a fish. It’s the moments of quiet solitude, the rhythmic dance of casting and retrieving, the connection with the water and the life it holds.


This connection, this bond between the fly fisher and nature, is an inherent part of fly fishing’s beauty.

You start to notice the small, often overlooked details—the way the water flows around a rock, the subtle change in the water’s surface indicating a fish’s presence, the myriad colors and patterns on a single fly.

These details enrich the overall experience, painting a vivid picture that stays with you long after you’ve packed up your gear.
Ultimately, the beauty of fly fishing lies not just in the sights, but in the feelings it evokes, the experiences it provides, and the connection it fosters with the natural world.

It’s a multi-sensory, immersive art form that encourages us to observe, to listen, to feel, and most importantly, to appreciate the beauty that surrounds us.

The art of fly fishing is, in essence, a love letter to the wonder and grandeur of nature.

When I go fly fishing, I feel excited—it’s a passion of mine. Everything I do on the water reflects who I am, my mood, my thoughts. It’s like speaking a language that only nature understands.


In fly fishing, my rod is my brush, and the river is my canvas. I paint my emotions, hopes, and experiences with every cast. When my fly lands perfectly, it’s pure joy—it’s like capturing a moment of harmony between my intention and skill.


is fly fishing an Art


The decisions I make while fishing—the way I read the water, and understand fish behavior—are expressions of my knowledge and dedication.

Each fish I catch symbolizes my connection with nature and the time I’ve spent learning.


But fly fishing isn’t just about catching fish. It’s about the quiet moments, the time spent alone with nature, reflecting on life. These moments allow me to express myself in ways words can’t.


Fly fishing is like a conversation between me and nature. Each cast, each fly, each fish, tells a part of my story. It’s a language of passion, patience, and respect—a beautiful form of expression.


So, next time you’re by the water with your rod, remember: fly fishing isn’t just a hobby, it’s a way to express yourself. It’s your story, shared with the river, the fish, and nature itself. Every moment is a chapter in your unique tale, shaped by the art of fly fishing.

When I cast my line onto the water, I feel calm. Fly fishing isn’t just about waiting for a bite. It’s like a dance that connects us to ourselves and nature.


Picture standing by a quiet river, hearing the wind and birds. Everything slows down as you focus on casting your line and waiting for a fish. You’re completely present, noticing every detail—the sound of your line, the splash of your fly.

Royal Wulff Fly : How to Ties this Remarkable Dry Fly


As you cast and reel in, you fall into a soothing rhythm. It’s like meditation, a break from everyday life to reflect and unwind.
Fly fishing teaches mindfulness. It helps us focus on the moment and find peace in nature. It’s a way to escape and connect with the world around us.


It’s not just about catching fish. It’s about finding tranquility in the water, feeling at peace with each cast. Fly fishing is calming and captivating—a journey for the body, mind, and spirit.

As I contemplate whether fly fishing qualifies as art, I confidently affirm it does. Fly fishing embodies creativity, beauty, personal expression, and mindfulness, making it a unique and inspiring art form.


I see fly fishing as a performance, a delicate dance between humans and nature, requiring interpretation and adaptation like painting or dancing. The aesthetic experience of fishing—the shimmering water, and lush riverbanks—adds to its artistic appeal.


Fly fishing also serves as a means of self-expression. Each cast, fly selection, and fish caught reflects our individuality, telling a personal story. Moreover, it offers a meditative retreat, fostering mindfulness and a deep connection with nature.


Ultimately, fly fishing enriches our lives, connecting us with nature and fostering personal growth. It’s not just about catching fish but about the experiences and stories created along the way.


So, as you venture out with your fishing rod, embrace the artistic dimensions of fly fishing. Enjoy the creative process, appreciate the beauty, express yourself freely, and find harmony with nature. In essence, fly fishing is an extraordinary, enriching, and deeply satisfying art form.

Greenwells Glory: How to Tie 3 Remarkable Fly Patterns

Greenwells Glory

Greenwells Glory: How to Tie 3 Remarkable Fly Patterns

Greenwells Glory

For over 40 years, I’ve kept Greenwells Glory flies in my box because they’re great at tricking trout and grayling, whether they’re wet or dry.

So, when someone asks me what fly to use for imitating hatching olives, I always suggest tying on a Greenwell’s Glory.

It’s been around for ages and still works like a charm, mimicking the olives you find in rivers and stillwaters.

Originally made as a wet fly back in the 1800s, it’s now super famous among trout anglers in the US and UK. Now, let’s check out the patterns I use when tying them.

Throughout my journey of tying flies, the original Greenwells Glory has always been something special to me. Made in the 1800s by Canon William Greenwell, it still mesmerizes anglers like myself today.

Greenwells Glory

The pattern stands out with its beautiful reddish-brown hackle, a slim body of yellow silk with gold wire ribbing, and a unique starling wing. Crafting it with care adds to its appeal.

What’s really impressive about this pattern is how versatile it is. Because of its delicate hackle and slender body, it can imitate various insects really well, which is why it’s still so popular.

This timeless classic, mixing beauty with usefulness, has definitely earned its spot in my collection of best tied flies.

Greenwells Glory Spider

For those new to fly tying, the Greenwells Glory spider pattern is a great place to start. Not only is it simple to tie, but the materials needed are cheap and easily obtained. To tie the Greenwells Glory spider, you will need the following materials:

To rig a rubber bobber stop:

  • Hook: #12 to #16 HENDS BL354
  • Thread: 8/0 Waxed Olive Uni-Thread
  • Body: 8/0 Waxed Olive Uni-Thread
  • Rib: Fine Gold Wire
  • Hackle: Greenwell Hen feather

Let’s break down the steps for tying the Greenwells Glory spider:

  • Step 1. Start by waxing the thread and attaching the fine gold wire. Then, wind the thread down the hook shank, stopping where the barb of the hook would be.
  • Step 2. Next, wind the thread towards the eye of the hook and wrap the gold wire evenly to create the ribbed body. Secure the wire about 3 mm away from the eye by wrapping the thread around it.
  • Step 3. Now, pick out a Greenwell hen hackle and remove any fluff and long fibers from the base of the feather.
  • Step 4. Stroke the hackle fibers backward and tie the feather in by its tip, about 3mm from the eye of the hook, using the waxed olive thread.
  • Step 5. Wind the hackle feather around the hook shank 2 or 3 times to create the hackle. Then, tie off the feather and use the thread to form a tidy head.
  • Step 6. Finally, finish off by making a whip finish and applying varnish to the head for durability.
Greenwells Glory Wet Fly

The Greenwells Glory wet fly is another versatile pattern that has proven its worth on the water. Here are the materials you’ll need to tie the Greenwells Glory wet fly:

  • Hook: #12 to #16 HENDS BL354
  • Thread: 8/0 Waxed Olive Uni-Thread
  • Body: 8/0 Waxed Olive Uni-Thread
  • Rib: Fine Gold Wire
  • Wing: Rolled starling wing feather
  • Hackle: Greenwell Hen feather

Now, let’s go through the step-by-step process for tying the Greenwells Glory wet fly:

  • Step 1. Begin by waxing the thread and securing the fine gold wire as described in steps 1 and 2 of the spider pattern.
  • Step 2. Cut a section of a starling wing feather, approximately 8 mm wide, and fold it. Position the folded wing so that the tip slightly extends beyond the bend of the hook. Secure the other end of the wing with a few turns of the waxed tying thread.
  • Step 3. Next, tie in a prepared Greenwell hen hackle by its tip. Wind the hackle feather around the hook shank with two turns to create the hackle. Then, tie off the hackle and use the thread to form a tidy head.
  • Step 4. Finally, complete the fly by making a whip finish and applying varnish to the head for durability.
Greenwells Glory Parachute Dry Fly

Here are the materials needed for the Greenwells Glory parachute dry fly:

  • Hook: #12 to #16 HENDS BL354
  • Thread: 8/0 Waxed Olive Uni-Thread
  • Body: 8/0 Waxed Olive Uni-Thread
  • Rib: Fine Gold Wire
  • Wing Post: White Veniard Polypropylene Floating Yarn
  • Hackle: Medium Dun Genetic cock feather

If you prefer dry fly fishing, the Greenwells Glory parachute dry fly is a fantastic choice. It mimics a fly attempting to escape the water’s surface, making it irresistible to trout and grayling.

Let’s go through the step-by-step process for tying the Greenwells Glory parachute dry fly:

  • Step 1. Start by waxing the thread and securing the fine gold wire, following steps 1 and 2 from the spider pattern.
  • Step 2. Take a folded piece of polyethylene yarn and tie it onto the body of the fly, positioning it approximately 3 mm from the hook eye.
  • Step 3. Now, tie in a medium dun genetic cock hackle at the base of the post, securing it up the post with the olive thread.
  • Step 4. Form the hackle by winding the feather down the wing post, and then secure it at the base of the post with the waxed thread. Create a tidy head with the thread.
  • Step 5. Finally, finish off the fly by making a whip finish, applying varnish to the head for durability, and cutting the post to the desired length.

When I hit the waters with my Greenwells Glory Spider and Wet fly, there are a few things I keep in mind to maximize my success. I’ve found that the Spider variant is excellent for fish feeding on the surface.

I typically cast it into the current and let it drift naturally, giving the illusion of a helpless insect trapped in the water’s film.

My trick here is to use a lighter tippet, which helps the fly maintain a natural, low-riding position.

Now, for the Wet fly variant, the game changes slightly. This pattern is my go-to when I sense the fish are feeding deeper.

I generally cast upstream and let the fly sink, allowing the current to carry it down and across. To give it that extra enticing movement, I sometimes impart a slight twitch to my rod tip, imitating a struggling insect.

Believe me, this little trick can often make the difference between a bite and a pass. Remember, the key here is patience and keen observation. Happy fishing!

Fishing with the Greenwells Glory Parachute Dry Fly requires a certain level of keen observation and precision. I can’t stress enough the importance of timing when using this pattern.

As I watch the water’s surface, I am constantly looking for signs of rising fish. If I spot fish actively feeding on the surface, that’s my cue to deploy the Greenwells Glory Dry Fly.

Now, casting this fly requires some finesse. Since it’s designed to float high and remain upright on the water’s surface, you want to aim for a gentle landing.

A heavy splashdown can scare off the very fish you’re trying to entice. Practice casting so that your fly lands as naturally as possible – the more it looks like a real insect alighting on the water, the better.

Matching the hatch is another essential trick I’ve learnt over the years. Pay close attention to the insects that are currently buzzing around and on the water.

Your Greenwells Glory Dry Fly should mimic these bugs to attract the fish. If it’s a mayfly hatch, you can bet the fish are looking for mayflies.

By presenting a fly that closely resembles what they’re already feeding on, you increase your chances of a successful catch.

Remember, when it comes to fly fishing, patience is key. It might take a few casts to find the right rhythm and the perfect spot.

But when you do, and you see that fish rise to take your Greenwells Glory Dry Fly – trust me, it’s a moment of pure magic that’s worth the wait.

I use many greenwells glory flies. the following are some of my favorites:

  • Large Dark Olive,
  • Spurwings,
  • Olive Upright,
  • Blue-Winged Olives,
  • Medium Olives,
  • Pale Water Dun etc.

In my fly fishing journey, i’ve tried lots of fly patterns, but Greenwells Glory isone of my favorites.

It’s always been special to me because it works so well and looks great. Whether you’re new to fly fishing or a pro, you should give it a try.

There are different types of Greenwells Glory, like the Original and the Spider. They all have their own charm. I bet you’ll like using Greenwells Glory as much as I do. So, go ahead and add it to your collection.

You’ll have fun tying and fishing with it, I promise!

How to Use Bobber Stoppers (4 Type Explained)

How to tie bobber stopper

How to Use Bobber Stoppers (4 Type Explained)

How to tie bobber stopper

If you’re new to bobber fishing or interested in trying slip bobbers, you might be curious about how to use bobber stops, as they’re essential for slip bobber fishing. There are various types of bobber stops, and each is rigged and utilized differently.

Keep reading this article if you want to discover how to rig and use the different types of bobber stops.

Bobber stops is small piece of string, rubber, or plastic that you place on your fishing line to prevent your bobber from sliding further up the line.

What is bobber stopper

Without these stops, your line would just keep running through your bobber until your rig hits the bottom. So, to keep your bait at the depth you want, you need a bobber stop.

Accompanying the bobber stop is a stop bead, which prevents your slip bobber from getting stuck on the stop. This way, your bobber can slide down the line again when you reel in your rig.

The big advantage of using slip bobbers with bobber stops, as opposed to fixed bobbers, is that you can easily adjust the depth while fishing. 

Check On Amazon

There are four main types of bobber stops, and we’ll take a look at each one and how to use them.

Types of Bobber Stoppers

  • Rubber Bobber Stop
  • Slip-Knot Bobber Stop
  • 4-Hole Bobber Stop
  • Dogbone Bobber Stop

Rubber bobber stops, also known as egg bobber stops, come in different sizes (S, M, L) based on your line’s pound test. Here’s how to choose the right size:

Size Pound Test
Small 2-4lb
Medium 4-8lb
Large 8-12lb

To rig a rubber bobber stop:

  1. Thread your fishing line through the small wire loop.
  2. Leave a tag end of about 2-3 inches from the wire loop.
  3. With your thumb and index finger, slide a small rubber stop onto your line.
  4. Slide the small stop bead onto your line in the same way.
  5. Add your slip bobber and end tackle to finish.
  6. To adjust your fishing depth, move the rubber bobber stop up or down the line using your thumb and index finger.
Rubber Bobber Stops

By following these steps, you can effectively use rubber bobber stops to control your fishing depth.

Check On Amazon

Slip-knot bobber stops are commonly used with slip bobbers and often come included with them. Here’s how to use them:

  1. Thread your fishing line through the small piece of tube.
  2. Slide the piece of string onto your fishing line.
  3. Remove the piece of tube now that the string knot is on the line.
  4. Pull each end of the string until the stop knot sits tight on your line.
  5. Trim off the excess string, leaving only the knot (but not too close to it).
  6. Slide the stop bead onto your fishing line.
  7. Finally, slide the slip bobber onto your line and attach your tackle. To adjust your fishing depth, slide the stop knot up or down the line until you reach your desired depth.
Slip-Knot Bobber Stop

With these steps, you can effectively use slip-knot bobber stops to control your fishing depth.

Check On Amazon

The 4-hole bobber stops are crafted from plastic and feature four small holes. They typically measure between 5 to 7 millimeters in length and are paired with a stop bead. Despite being made of plastic, these bobber stops are quite flexible, which is handy when threading them through your fishing rod’s line guides and onto the reel’s spool.

The holes in these stops are spacious enough to accommodate lines with a test weight of up to 12 pounds without any difficulty.

 Here’s how to use them:

  1. Thread the end of your fishing line through the first hole of the bobber stop.
  2. Weave the tag end in and out through the remaining two holes.
  3. Slide the stop bead onto your fishing line.
  4. Attach your slip bobber and tackle, and you’re ready to go. The 4-hole bobber stop stays tight on your line and can only be moved by sliding it up or down. Thanks to its design, it won’t slide down your line on its own.
4-Hole Bobber Stops
Check On Amazon

The dogbone bobber stop is also made of plastic and comes with its own stop bead. Here’s how to use it:

  1. Run your fishing line through one of the holes in the dogbone stop.
  2. Twist your line around the dog bone 2-3 times.
  3. Run the end of your line through the second hole of the dog bone stop.
  4. Slide the stop bead onto your fishing line.
Dogbone Bobber Stop
Credit: In fisher man

Twisting the line around the dogbone prevents the bobber stop from sliding down your fishing line when casting or reeling in. Congratulations, now you know how to use and rig up both types of bobber stops. Happy fishing!

The following are three unique ways of using blobber stoppers:

A lightweight Carolina rig, also called a split-shot rig, is great for dragging bait over flats or through submerged vegetation. Unlike the usual Carolina rig for deeper waters, this lighter version uses a 1/4-ounce weight and a 12- to 18-inch leader.

You don’t need a swivel for this setup. Instead, thread a bobber stopper, then a VMC Tungsten Weight, and another bobber stopper onto the main line.

Add a 4/0 EWG hook, and you can easily adjust the leader length by sliding the bobber stoppers and weight along the line.

Plus, you can switch seamlessly from a Carolina rig to a lightweight Texas rig without redoing your setup.

However, be careful with heavier weights or lighter lines. Heavier weights might make the bobber stoppers slide during casting, and lighter lines may not grip the stoppers securely.

Make sure the bobber stopper size matches your line diameter. If not, using two stoppers on each side of the weight can help prevent slipping.

Pro angler John Cox has a smart trick for preventing braided line from tangling in topwater bait props. He stacks two bobber stoppers snugly against the bait’s eye to keep the line rigid and avoid tangles.

This eliminates the need for a braid-to-monofilament leader, making setup simpler and reducing potential failure points.

To keep your rods and reels ready to rig without tangles, use bobber stoppers or cork pieces. For rods with micro guides, slide a bobber stopper onto the tag end of the line and reel it up to the rod tip before storing in a Rod Glove.

For reels with smaller diameter guides, a combination of cork and bobber stoppers can secure the line effectively. This method minimizes line wastage and saves time by eliminating the need for rethreading, so your gear is always ready for action.

Before I started using a bobber stopper, I had to resort to a few different methods to reset my indicator after catching a few fish. (Don’t tell my girlfriend I hook up with fish.)

The most common technique involved using my arm’s wingspan as a measuring tool. Every time I caught a fish, I had to remeasure the depth, adjust the indicator, and cast again. This became quite time-consuming.

There were also instances where I tried marking the leader with a permanent marker, only to forget which line was set to the correct depth. It was inaccurate, to say the least.

And if I really wanted to waste time, I could reattach my forceps to the fly and redo the entire process of measuring the depth.

Let’s imagine the scene.

We anchor down and crack open a beer. We determine our desired depth and set our strike indicator accordingly. Then, we slide our bobber stopper down the line, positioning it directly above the indicator.

We cast our line and eagerly watch for the indicator to drop. Boom! We set our hook and reel in the fish. After taking our Instagram-worthy photo, we release the fish back into the water.

To reset, we simply move our strike indicator below the bobber stopper’s position. Cast out again. Take another sip. Watch for that indicator to drop.

A bobber stop or bobber stopper is a small piece of tackle that can be used in a variety of rigs and fishing situations.

A bobber stop allows you to easily adjust the depth of your bobber and can also peg your weight into certain positions making line management much easier.

I hope this quick bobber stopper guide has provided value to you and that it helps you understand what bobber stoppers are and how and when they should be used.

7 Easy Steps to Tie Bobber Stopper Knot

7 Easy Steps to Tie Bobber Stopper Knot

7 Easy Steps to Tie Bobber Stopper Knot

7 Easy Steps to Tie Bobber Stopper Knot

When it comes to fly fishing, having the right tools and techniques can make all the difference in your success on the water. One such tool that every fly angler should have in their arsenal is the bobber stopper knot.

This versatile knot can be used in various situations and can greatly enhance your fishing experience. In this comprehensive guide, we will explore the ins and outs of the bobber stopper knot, from its purpose and benefits to step-by-step instructions on how to tie it.

So, grab your fly rod and get ready to take your fly fishing game to the next level!

The bobber stopper knot, also known as a float stopper knot, is a simple yet effective knot that is used to prevent your strike indicator, or bobber, from sliding up and down your fishing line.

what is a bobber knot

While its primary purpose is to mark the position of the indicator for easy resetting, it can also be used to adjust the depth at which your fly is presented.

This makes it an invaluable tool for fly anglers who want to target specific depths in the water column.

Using a bobber stopper knot offers several advantages for fly anglers:

  1. Quick and Easy Depth Adjustment: With a bobber stopper knot in place, you can quickly and easily adjust the depth at which your fly is fishing. This allows you to target fish at different depths without the need for complicated leader adjustments or retying knots.
  2. Consistent Depth Control: Once you have set your bobber stopper knot at a specific depth, it will stay in place throughout your fishing session. This ensures that your fly consistently fishes at the desired depth, increasing your chances of enticing strikes from fish.
  3. Efficient Fly Changes: When you need to change flies, having a bobber stopper knot in place makes the process much faster and more efficient. You can simply remove the old fly, attach the new one, and slide the bobber stopper knot back into position. No need to re-measure and adjust your leader each time.
  4. Versatility: While the bobber stopper knot is commonly used with strike indicators, it can also be used with other types of bobbers or floats. This versatility allows you to adapt to different fishing situations and target various species of fish.

Now that you understand the benefits of using a bobber stopper knot, let’s dive into the step-by-step process of tying this essential knot.

How to Tie Bobber Stopper Knot
Credit: Mushky Shop

Follow these instructions, and you’ll be ready to hit the water with confidence:

Before you begin tying the bobber stopper knot, gather the following materials:

  • Main fishing line
  • Monofilament fishing line or Dacron fly line backing for the stopper line
  • Bobber or strike indicator

Lay the stopper line against the main fishing line at the desired location where you want the bobber to stop. Double back the stopper line to form a loop, making sure it is snug against the main line.

Hold the loop where the stopper line crosses over itself and the main fishing line. Make three or four turns around both lines, passing the stopper line through the open loop each time.

Pull the two ends of the stopper line in opposite directions to tighten down the knot securely against the main line. Ensure that the knot is snug and won’t slip when pressure is applied.

Using a pair of scissors or line clippers, trim the tag ends of the stopper line close to the knot, leaving a neat and clean finish.

Slide the bobber or strike indicator onto your main fishing line below the bobber stopper knot. Make sure it is positioned securely against the knot to prevent any slippage during fishing.

With the bobber stopper knot in place and the bobber or strike indicator attached, you can now adjust the depth at which your fly will fish.

Simply slide the bobber stopper knot up or down the line to the desired position. Once you have set the depth, make your cast and get ready to entice some fish!

Recommended: How To Fish Emerger For Trout

To make the most of your bobber stopper knot, here are some additional tips and tricks to keep in mind:

  • Experiment with Depths: Don’t be afraid to adjust the depth of your fly using the bobber stopper knot. Different fish species may be holding at various depths, so try different settings to find what works best.
  • Consider Water Conditions: Factors such as water depth, current speed, and fish behavior can influence the optimal depth for fishing. Pay attention to these variables and be willing to make adjustments as needed.
  • Use Different Bobber Colors: If you’re using a colored bobber or strike indicator, choose a color that contrasts well with the water conditions. This will make it easier for you to spot any movement or subtle strikes.
  • Inspect the Knot Regularly: Before each fishing session, inspect your bobber stopper knot to ensure it is still secure and in good condition. A weak or damaged knot could lead to lost fish or frustration on the water.
  • Practice Makes Perfect: Like any other knot, tying the bobber stopper knot takes practice. Spend some time at home honing your knot-tying skills so that you can tie it confidently and efficiently on the water.

Now that you have mastered the art of tying a bobber stopper knot, it’s time to head out to your favorite fishing spot and put your newfound knowledge to the test.

Whether you’re targeting panfish, trout, or other species, the bobber stopper knot will prove to be a valuable tool in your fly fishing adventures. So, tie it on, cast your line, and get ready for a memorable day on the water!

In the world of fly fishing, having the right techniques and tools can greatly enhance your fishing experience. The bobber stopper knot is one such tool that every fly angler should have in their repertoire.

Its versatility and ease of use make it an invaluable asset on the water. By following the step-by-step instructions provided in this guide, you can confidently tie a bobber stopper knot and elevate your fly fishing game.

So, grab your fly rod, tie on that bobber stopper knot, and get ready to reel in some unforgettable catches!

Are Fly Fishing Reels Reversible? Everything You need to Know

are fly fishing reels reversible

Are Fly Fishing Reels Reversible? Everything You need to Know

are fly fishing reels reversible

‍‍
Fly fishing reels are one of the unknown heroes of a fly fishing outfit. While rods and lines often take the spotlight, it’s important not to overlook the features and functionality of fly reels.

When I started using the fly reels, I thought if they could be reversed. Since I don’t use a specific casting style and prefer a right-hand retrieve, this was important to me.

I was happy to find out that they were the answer. In this guide, I am going to share it with you.

What is a Fly Reels?

A fly reel is a cylindrical device that attaches to the bottom of a fly fishing rod. Its primary function is to store and retrieve the fly line, providing control and tension during the casting and reeling process.

what is fly reel

Traditional fly reels have a spinning spool that turns as you reel the line in or let it out. You control this spinning with a handle or crank on the reel.

The reel also has a drag system that lets you add resistance to stop the line from breaking when a fish pulls on it.

Can You Reverse a Fly Fishing Reel?

Yes, most modern fly fishing reels are designed to be reversible. This means you can change which way you reel in the line to suit your preference.

are fly fishing rod Reversible

The steps to reverse the direction may vary a bit depending on the reel you have, but the main idea is the same.

How to Reverse a Fly Reel?

Reversing a fly fishing reel isn’t always the same for every brand. Each company may have its own way of doing it. However, the general idea is similar across all reels. Here’s how you can do it:

  • 1. First, split the reel in two. Look for a lever or lock on the side of the reel crank. Push the lever or unscrew the lock to separate the two parts of the reel, called “cheeks.” Hold onto both parts tightly to avoid dropping them.
  • 2. Focus on the bigger part of the reel, which usually holds the line. This part likely has the clutch bearing you need to adjust.
  • 3. Find the clutch bearing held in place by a flip spring. These parts are usually in the female section of the reel.

Note: In some sealed reel designs, the clutch bearing might be in the male section. You’ll need to open it with a flathead screwdriver, flip the bearing, and seal it back.

  • 4. Make sure the flip spring isn’t fully connected. There’s usually a gap in the spring to keep tension. Carefully pry out the part of the spring with the gap, keeping your thumb over the rest of the spring to avoid losing it.
  • 5. Once the flip spring is out, you’ll see a nut facing up. Remove it and flip it over to change the retrieve hand.
  • 6. Put the flip spring back in place securely.
  • 7. Reconnect the male end of the reel into the female end. You should hear a snap, indicating everything is back together correctly.

Note: Remember, these are just general steps. Your reel might be a bit different, so it’s a good idea to check the instructions from the manufacturer or ask someone who knows if you’re not sure what to do.

Considerations When Switching Reeling Direction

When you’re switching the direction you reel in your fly fishing reel, there are some important things to think about:

Respooling the Line

It’s a good idea to re-spool the line when you switch directions. This makes sure the line is put on the reel properly and avoids any problems when you cast or reel.

Take the time to take off the line and back and put it back on in the new direction.

Cleaning and Maintenance

While you’re re-spooling, it’s a good time to clean and take care of your fly line and reel. Use warm water, gentle soap, and soft cloths to clean the line well.

Also, clean and put oil on the reel to keep it working smoothly and lasting a long time.

Adjusting Drag and Tension

When you change the direction in your reel, make sure to check and change the drag and tension settings. The drag should be set so it’s hard enough to stop a fish without breaking the line.

Thinking about these things will help your reel work its best and make your fly fishing better.

Is it Wrong to Switch Hands After Casting?

It’s perfectly fine to switch hands after casting in fly fishing. Some anglers, especially those fishing for saltwater species, prefer to cast and reel in with the same hand for more comfort and power, especially when dealing with larger fish.

However, many freshwater anglers cast with their dominant hand and reel in with the other hand.

This method works well for smaller fish, as it allows for better control and coordination during the fight.

Ultimately, whether to switch hands depends on personal preference and the type of fish you’re targeting.

If you’re going after larger or stronger fish, it might be better to stick to casting and reeling with the same hand for maximum control and power.

Benefits of Reversible Fly Reels

Now that you know fly fishing reels can be reversed, you might wonder why it matters. Here are some reasons why having a reversible fly reel is useful:

  • 1. Casting Comfort: Reversing the reel lets you cast with your dominant hand and switch to your non-dominant hand for reeling. This can give you better control and comfort when you cast for a long time.
  • 2. Convenience: If you share your fishing gear with others who like to reel in different ways, a reversible reel means everyone can use the same equipment without any problems.
  • 3. Versatility: Reversible reels are handy when you’re fishing for different kinds of fish or in different conditions. You can switch your retrieve hand to match the situation you’re fishing in.
  • 4. Personal Preference: Some anglers just prefer to reel in a certain way because it feels more comfortable or natural to them. Reversible reels let you choose what works best for you.

Additional Tips for Reversing Reeling Direction

Here are some extra tips to remember when changing the reeling direction of your fly fishing reel:

  • 1. Follow the manufacturer’s instructions: Every reel might have specific steps for reversing the retrieval direction. Check the manufacturer’s manual or website for detailed guidance.
  • 2. Get help if you need it: If you’re not sure about the process or run into any problems, don’t hesitate to ask a professional angler, visit a fly shop, or consult a reel technician. They can offer advice and make sure everything is done right.
  • 3. Practice casting and reeling with the new hand: Once you’ve switched the reeling direction, take some time to practice casting and reeling with your new hand. This will help you get used to the change and become comfortable with it.
  • 4. Keep your reel maintained: To keep your reel working smoothly and lasting a long time, make sure to clean it after each fishing trip, add lubrication where needed, and check for any damage or signs of wear.

Final Words

In summary, fly fishing reels can be reversed, allowing you to change the reeling direction to suit your preference.

While the process may vary depending on the reel model, it generally involves disassembling the reel, adjusting the clutch bearing, and putting everything back together correctly.

Switching the reeling direction has several benefits, including improved casting comfort, convenience for sharing equipment, versatility in different fishing situations, and the ability to cater to personal preferences.

However, it’s essential to re-spool the line, clean and maintain the reel, and adjust the drag and tension settings when reversing the retrieve direction.

It’s perfectly fine to switch hands after casting, a common practice among anglers. Ultimately, the choice depends on personal preference and the fishing conditions.

Now that you understand how fly fishing reels can be reversed, you can confidently select and adjust your reel to enhance your fly fishing experience. Happy fishing!

Additional Information: Being a keen fly fisherman, I know how crucial it is to have a reel that matches your casting and reeling style. Reversing the retrieve direction gives you more options to customize and adapt your fishing gear.

Don’t hesitate to try different setups until you find what suits you best. And always remember, fly fishing isn’t just about catching fish—it’s also about enjoying the experience and connecting with nature.

How to Tie Grey Duster Fly: 3 Amazing Patterns

Grey Duster Fly How to Tie 3 Productive Patterns

How to Tie Grey Duster Fly: 3 Amazing Patterns

Grey Duster Fly How to Tie 3 Productive Patterns

Whether you’re new to fishing or a pro, learning how to tie the Grey Duster fly can improve your fishing trips. This classic fly is simple but works like a charm, helping fishermen catch more fish everywhere.

In this Guide, we’ll walk you through everything you need to know about the Grey Duster fly, from getting the right materials to showing you three great ways to tie it.

Must Read: An In-depth Guide on Fly Fishing Tippet

What is Grey Duster Fly?

The Grey Duster fly is a popular fishing fly that’s been around for over 200 years! People love it because it’s simple but works well. It’s like a magnet for all sorts of fish.

What is Grey Duster Fly?

This fly is designed to look like different stages of mayflies and other kinds of flies that fish like to eat. Its grey body and feathery surface make it look like the real thing floating in the water. Fish can’t resist it!

Learning how to tie this fly is a big deal for fishermen. It lets them catch all kinds of fish in different places and conditions.

Even though it’s a basic design, it is an art form. It’s fun to do and makes fishing even more exciting.

While some fishing flies go in and out of style, the Grey Duster fly has stuck around. It’s still a favorite for lots of experienced fishermen.

Its long-lasting popularity shows how awesome it is at catching fish. Knowing about the Grey Duster fly is essential whether you’re new to fishing or a pro. It adds a whole new level of fun to your fishing trips!

Essential Materials for Tying a Grey Duster Fly

You’ll need a few things to make your own Grey Duster fly. First, you’ll need a dry fly hook sized between 12 and 14. This size works well for the Grey Duster and helps attract lots of different fish.

The body of the fly is made from light grey thread. This color is important because it makes the fly look like different insects. So, make sure you have a good quality golden grey thread. It will make your fishing easy.

Next, you’ll need a grizzle cock hackle. This special feather has a unique pattern and structure, making the fly look real to fish. Wrapping it around the fly seems like legs and wings, making fish want to bite!

Add some fine lead wire if you want your fly to sink faster. Wrapping this around the hook at the start adds weight to the fly. That way, it can reach fish that hang out in deeper water.

Make sure to pick good quality materials. You want strong thread, fresh feathers, and a sturdy hook to make your Grey Duster fly look great and can handle fish nibbles.

Now that you have all your materials, you can make your own Grey Duster fly!

Recommended: How To Fish Emerger For Trout

How to Tie a Basic Grey Duster Fly

Making your own Grey Duster fly is easy, even if you’re new to it. Here’s how to do it:

  • First, put your hook securely into your fly-tying vise.
  • Take your light grey thread and wrap it along the hook’s shank to make the body of the fly.
  • Now, get a grizzle cock hackle feather and attach it to the back of the fly.
  • Wrap the hackle towards the front, making it look like legs and wings.
  • Use the thread to tightly secure the feather in place, trim any extra bits, and tidy up the head.
  • Ta-da! You’ve made a basic Grey Duster fly!

As you get better, you can try different versions of the fly. Experimenting is part of the fun!

Must Read: History of Fly Fishing

How to Tie 3 Productive Grey Duster Pattrens

The Grey Duster fly is a pattern used for decades to catch trout and other game fish. Its simple design makes it easy to tie, and its effectiveness makes it a staple in many anglers’ fly boxes.

Here, we’ll go over the steps to secure the traditional Grey Duster fly, as well as three variations that have proven to be productive.

Traditional Grey Duster Fly

Materials

  • Hook: Size 12-16 dry fly hook
  • Thread: Grey or black 8/0
  • Tail: Grey or brown hackle fibers
  • Body: Grey or olive dubbing
  • Wing: Grey or white hackle fibers
  • Hackle: Grizzly or brown

Steps by Step Guide

Step 1: Start by securing the hook in the vise and wrapping the thread from the eye to the bend of the hook. Tie in a small clump of hackle fibers for the tail.

Step 2: Wrap the thread to the eye and create a small dubbing ball with gray or olive dubbing. This will be the body of the fly.

Step 3: Tie in a small clump of hackle fibers for the wing just in front of the dubbing ball.

Step 4: Tie in a grizzly or brown hackle in front of the wing.

Step 5: Wrap the hackle around the fly’s body, catching all the hackle fibers as you go. Tie off the hackle and trim the excess.

Step 6: Pull the wing fibers forward and tie them down before the feather. Whip finish and trim the thread.

Note: Some of the steps in the variations may be same may be same.

Variation 1: Grey Duster with a Red Tag

Adding a red tag to the Grey Duster can make it more visible to fish in murky water or low light conditions.

Materials

  • Hook: Size 12-16 dry fly hook
  • Thread: Grey or black 8/0
  • Tail: Grey or brown hackle fibers
  • Wing: Grey or white hackle fibers
  • Hackle: Grizzly or brown
  • Tag: Red floss or thread

Steps by Step Guide

Step 1: Start by securing the hook in the vise and wrapping the thread from the eye to the bend of the hook. Tie in a small clump of hackle fibers for the tail.

Step 2: Wrap the thread to the eye and create a small dubbing ball with gray or olive dubbing. This will be the body of the fly.

Step 3: Tie in a small clump of hackle fibers for the wing just in front of the dubbing ball.

Step 4: Tie in a grizzly or brown hackle in front of the wing.

Step 5: Wrap the hackle around the fly’s body, catching all the hackle fibers as you go. Tie off the hackle and trim the excess.

Step 6: Tie in a small piece of red floss or thread just in front of the dubbing ball. Wrap the red material around the hook shank a few times to create a small tag. Tie off the red material and trim the excess.

Variation 2: Grey Duster with a Peacock Body

Using peacock herl for the body of the Grey Duster can create a more flashy fly that attracts fish in clear water.

Materials

  • Hook: Size 12-16 dry fly hook
  • Thread: Grey or black 8/0
  • Tail: Grey or brown hackle fibers
  • Body: Peacock herl
  • Wing: Grey or white hackle fibers
  • Hackle: Grizzly or brown

Steps by Step Guide

Steps 1-3: Follow the same steps as the traditional Grey Duster fly.

Step 4: Tie in a few strands of peacock herl just in front of the wing.

Step 5: Twist the peacock herl together to form a rope and wrap it around the hook shank to create the fly’s body. Tie off the peacock herl and trim the excess.

Step 6: Follow the same steps as the traditional Grey Duster fly to tie in the hackle and wing.

Variation 3: Grey Duster with a CDC Wing

Using CDC feathers for the wing of the Grey Duster can create a more realistic profile that mimics a real insect’s wings.

Materials

  • Hook: Size 12-16 dry fly hook
  • Thread: Grey or black 8/0
  • Tail: Grey or brown hackle fibers
  • Body: Grey or olive dubbing
  • Wing: CDC feathers
  • Hackle: Grizzly or brown

Steps by Step Guide

Step 1: Start by securing the hook in the vise and wrapping the thread from the eye to the bend of the hook. Tie in a small clump of hackle fibers for the tail.

Step 2: Wrap the thread to the eye and create a small dubbing ball with gray or olive dubbing. This will be the body of the fly.

Step 3: Tie in a small clump of hackle fibers for the wing just in front of the dubbing ball.

Step 4: Tie in a grizzly or brown hackle in front of the wing.

Step 5: Wrap the hackle around the fly’s body, catching all the hackle fibers as you go. Tie off the hackle and trim the excess.

Step 6: Tie in a few CDC feathers just in front of the plumage. Ensure the tips of the feathers are even and extend just past the hook bend.

Step 7: Fold the CDC feathers back over the fly’s body and tie them down just before the feather.

Step 8: Follow the same steps as the traditional Grey Duster fly to wrap the hackle and finish the fly.

If You Want To Watch A video Click Here.

Practice Makes Perfect

Like mastering any skill, becoming a pro at tying the Grey Duster fly takes time and patience. Start by learning the basics, and once you feel confident, try out the different versions we’ve discussed.

The main goal is to make a fly that looks and moves like the bugs in the water where you fish. You might need to get creative, as each fishing spot is different.

But remember to enjoy the process! Every time you tie a Grey Duster fly, you carry on a tradition that’s been around for a long time. As you get better, you’ll feel proud of making flies that catch fish and show off your skills.

And don’t worry if things go differently at first. Every mistake is a chance to learn and get better. With each Grey Duster fly you make, you’ll improve and understand more about how to make flies that work well.

Whether you’re new to fly fishing or want to get better, practicing tying Grey Duster flies can make your fishing adventures even more fun. So, grab your materials and give it a try! Before you know it, you’ll make Grey Duster fly like a pro.

 South Fork Of the Snake River Fly Fishing | A Great Place to Fish

South Fork of the Snake River

If you could only fish one river for the rest of your life, pick the South Fork of the Snake River. It’s got over 60 miles of water, so there are trout everywhere.

With thirteen different access points, getting to the fish is easy. And where there’s lots of water, there’s lots of trout – over 5,000 fish per mile! From Palisades Dam to Lorenzo, Idaho, this river is full of fish like browns, rainbows, and cutthroat.

They’re usually around 15 inches long, but sometimes you’ll find ones up to 20 inches. The biggest fish ever caught fly fishing on this river was a whopping 22 pounds! And guess who caught it?

In this guide, we will discuss the south fort of the snake river fly fishing, equipment required and the best places to fish.

South fork of the Snake River Fly Fishing

The South Fork of the Snake River is the best place in the West to catch cutthroat fish. It’s been made great thanks to efforts by Idaho Fish and Game, local guides, and people releasing the fish they catch.

This shows that special rules can help protect these beautiful native trout in the Northern Rockies. The river starts from Palisades Dam, on the border between Wyoming and Idaho.

Big Fishes In The River

The South Fork has some giant fish. They’re about 16 inches long on average, but it’s common to find ones over 20 inches.

a big fish

The biggest catch in 2009 was a whopping 29 inches, and the most memorable one, caught by Head Guide Tom Fenger, weighed in at 22 pounds! You can find brown, rainbow, and cutthroat trout here.

Best Fly Fishing Spots on the South Fork Snake River

The South Fork of the Snake River is renowned for its abundance of prime fly fishing locations. Whether you’re a seasoned angler or a beginner, this section will guide you to the best spots along the river to find excellent fishing opportunities.

From popular access points to hidden gems, I’ll provide detailed descriptions and recommendations to help you plan your fishing trips effectively.

best places

So pack your gear and get ready to reel in some trophy-worthy trout!

The 5 Best Fly Fishing Spots on the South Fork Snake River

SpotLocationFeatures
1. Palisades CreekLocated near Irwin, IdahoCrystal-clear waters, abundant insect life, and breathtaking scenery
2. Cottonwood CampgroundSituated in Swan Valley, IdahoEasy river access, riffles, deep pools, and excellent hatches
3. Spring CreekFound near Heise, IdahoWell-stocked with trout, challenging wading conditions, and impressive cutthroat
4. Ashley CreekLocated near Conant Valley, IdahoSecluded spot, diverse insect population, and rewarding dry fly fishing
5. Upper CanyonSituated above America Falls ReservoirLess crowded, breathtaking canyon views, and large rainbow and brown trout
The 5 Best Fly Fishing Spots on the South Fork Snake River

SOUTH FORK OF THE SNAKE HATCHES:

Here’s a breakdown of the critical hatches on the South Fork of the Snake River:

  • March through June: Best for nymphing, but PMD hatches occur during bad weather.
  • Late June: Salmon fly hatch starts, followed by yellow Sallys and PMDs, then small golden stoneflies until August.
  • July: Yellow Sallys and PMDs continue, plus a green drake hatch in the third week.
  • August: PMDs hatch and a unique stonefly hatch lasting until early September.
  • September: PMDs and mahoganies hatch, followed by blue-wing olives in late September to mid-October.
  • Late Fall/Early Winter: Streamer season, targeting large brown trout in shallow water.

Nymphing works well year-round, especially in winter and early spring. Stay updated with local fly shops for fishing trends during shoulder seasons.

Fly Fishing Tips and Techniques

To maximize your success on the South Fork, it’s essential to have the proper fly fishing techniques and gear. This section will provide valuable tips for casting, presenting flies, and reading the water.

I’ll also cover essential gear you’ll need, such as rods, reels, lines, and flies. Applying these tips and using the right equipment will increase your chances of landing that trophy trout.

Casting

  • Practice your casting technique regularly to improve accuracy and distance.
  • Use a smooth and fluid motion when casting to avoid spooking the fish.
  • Start with shorter casts and gradually increase your distance as you become more proficient

Presenting Flies

  • Observe the water to identify key feeding areas where trout will likely be present.
  • Match the hatch by using flies that imitate the insects present in the water at that time.
  • Present your fly upstream or across the current to mimic natural drifts.

Reading the Water

Understanding the characteristics of the water can significantly improve your success in fly fishing. Look for:

  • Ripples and seams where the water transitions from fast to slow, as trout often position themselves here.
  • Deep pools where trout seek refuge and feed on larger prey.
  • Current breaks are created by rocks or structures where fish can hold and conserve energy.

Essential Gear

The right gear is essential for a successful fly fishing adventure on the South Fork. Here are the essential items you’ll need:

ItemDescription
Fly RodA lightweight, flexible rod designed specifically for fly fishing.
Fly ReelA reel that holds the fly line and provides drag for controlling fish.
Fly LineA specially designed line that allows the angler to cast the fly effectively.
FliesArtificial imitations of insects or baitfish used to attract trout.
Essential Gear

With these fly fishing tips, techniques, and the right gear, you’ll be well-equipped to tackle the South Fork of the Snake River. Prepare for an exciting angling experience and the chance to land impressive trout!

SOUTH FORK OF THE SNAKE Trips and Vacations

If You want to take a trip to south fork of the snake river, I recommend Ten ton Valley Lodge trip.

Final Words

Fly fishing on the South Fork of the Snake River is a fantastic experience in Idaho’s beautiful wilderness. Whether you’re new to fishing or a pro, this river has plenty of trout and breathtaking scenery for everyone to enjoy.

big fish

To make your fishing trips successful, learning proper techniques and having the right gear is important. Practice casting, know where to find fish, and bring quality rods, reels, lines, and flies.

Consider hiring a knowledgeable guide for insider tips and to discover the best spots. Follow fishing rules to protect the river and its trout.

Stay informed with fishing reports and understand seasonal changes for better planning. Get ready for unforgettable adventures on the South Fork of the Snake River!

FAQS

What makes the South Fork of the Snake River a popular destination for fly fishing?

The South Fork of the Snake River in Idaho is renowned for its stunning scenery and excellent trout fishing opportunities. Its diverse habitat and prolific insect life make it a haven for fly anglers seeking adventure and memorable catches.

What are some recommended fly fishing techniques for the South Fork?

Some effective fly fishing techniques for the South Fork include nymphing, dry fly fishing, and streamer fishing. It’s essential to adapt your approach based on the time of year, water conditions, and the specific hatch patterns to enhance your chances of success.

What fly fishing gear should I bring for the South Fork?

When fly fishing on the South Fork, it’s essential to have the right gear. Some necessary items include a quality fly rod, reel, fly line, leader, tippet, waders, boots, and a wide selection of flies that match the local insect population.

Where are the best fly fishing spots on the South Fork Snake River?

The South Fork offers numerous excellent fly fishing spots. Some popular locations include the Irwin area, the “Canyons” stretch, and the river sections below the Palisades Dam. However, the river is over 60 miles long, and various stretches offer productive fishing opportunities, so it’s worth exploring different areas to find your favorite spot.

Are there any regulations I should be aware of when fly fishing on the South Fork Snake River?

Yes, it’s important to familiarize yourself with the South Fork Snake River fishing regulations. These regulations cover creel limits, fishing seasons, catch and release policies, and any special regulations or restrictions in specific stretches of the river. Compliance with these regulations helps maintain the health of the fishery and ensures a sustainable experience for future anglers.