
How to Use Bobber Stoppers (4 Type Explained)

If you’re new to bobber fishing or interested in trying slip bobbers, you might be curious about how to use bobber stops, as they’re essential for slip bobber fishing. There are various types of bobber stops, and each is rigged and utilized differently.
Keep reading this article if you want to discover how to rig and use the different types of bobber stops.
What is a Bobber Stopper?
Bobber stops is small piece of string, rubber, or plastic that you place on your fishing line to prevent your bobber from sliding further up the line.
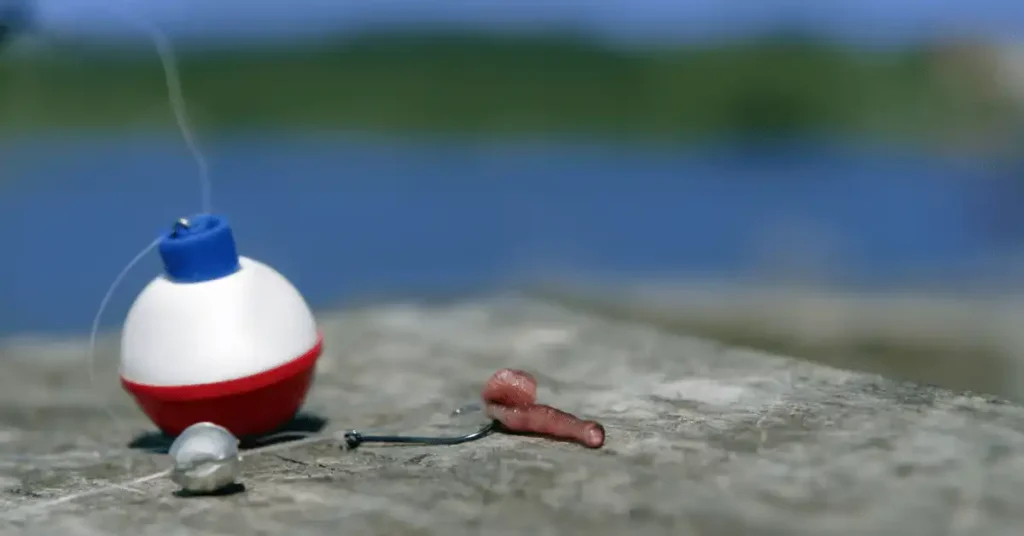
Without these stops, your line would just keep running through your bobber until your rig hits the bottom. So, to keep your bait at the depth you want, you need a bobber stop.
Accompanying the bobber stop is a stop bead, which prevents your slip bobber from getting stuck on the stop. This way, your bobber can slide down the line again when you reel in your rig.
The big advantage of using slip bobbers with bobber stops, as opposed to fixed bobbers, is that you can easily adjust the depth while fishing.
There are four main types of bobber stops, and we’ll take a look at each one and how to use them.
Types of Bobber Stoppers
- Rubber Bobber Stop
- Slip-Knot Bobber Stop
- 4-Hole Bobber Stop
- Dogbone Bobber Stop
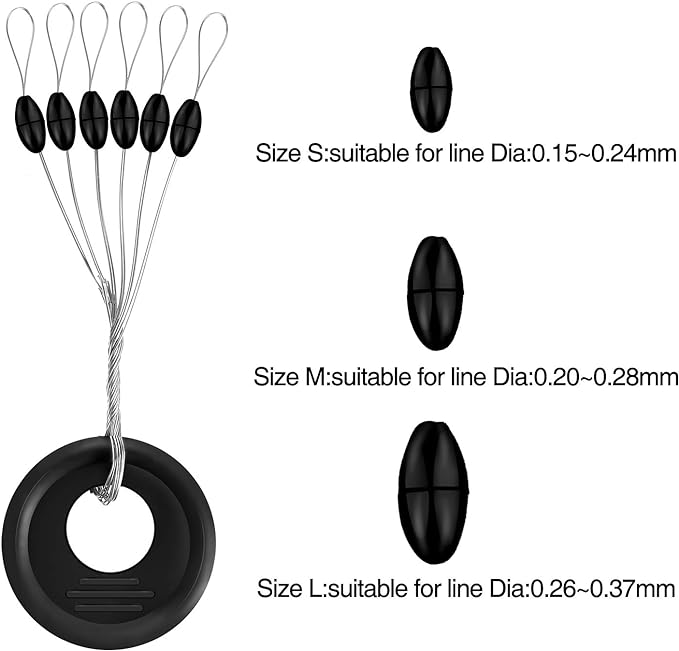
How to Use Rubber Bobber Stops
Rubber bobber stops, also known as egg bobber stops, come in different sizes (S, M, L) based on your line’s pound test. Here’s how to choose the right size:
| Size | Pound Test |
|---|---|
| Small | 2-4lb |
| Medium | 4-8lb |
| Large | 8-12lb |
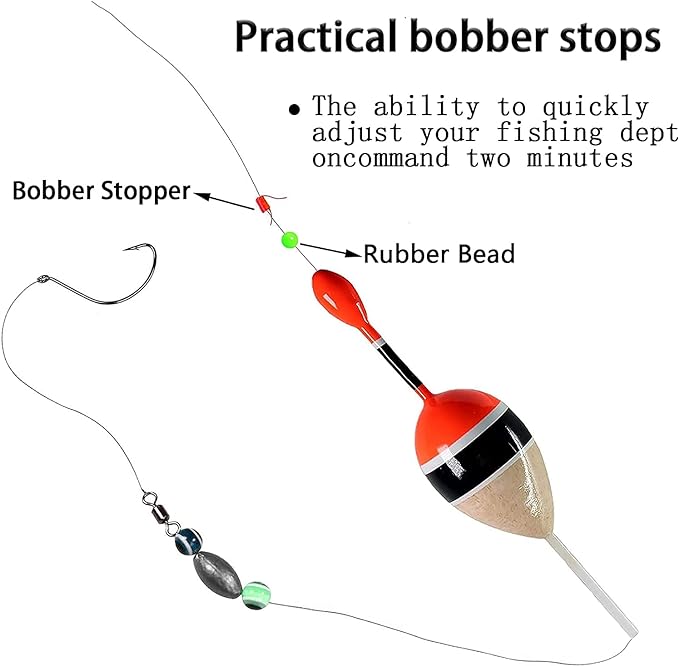
To rig a rubber bobber stop:
- Thread your fishing line through the small wire loop.
- Leave a tag end of about 2-3 inches from the wire loop.
- With your thumb and index finger, slide a small rubber stop onto your line.
- Slide the small stop bead onto your line in the same way.
- Add your slip bobber and end tackle to finish.
- To adjust your fishing depth, move the rubber bobber stop up or down the line using your thumb and index finger.
By following these steps, you can effectively use rubber bobber stops to control your fishing depth.
How to Use a Slip-Knot Bobber Stop
Slip-knot bobber stops are commonly used with slip bobbers and often come included with them. Here’s how to use them:
- Thread your fishing line through the small piece of tube.
- Slide the piece of string onto your fishing line.
- Remove the piece of tube now that the string knot is on the line.
- Pull each end of the string until the stop knot sits tight on your line.
- Trim off the excess string, leaving only the knot (but not too close to it).
- Slide the stop bead onto your fishing line.
- Finally, slide the slip bobber onto your line and attach your tackle. To adjust your fishing depth, slide the stop knot up or down the line until you reach your desired depth.
With these steps, you can effectively use slip-knot bobber stops to control your fishing depth.
How to Use 4-Hole Bobber Stops
The 4-hole bobber stops are crafted from plastic and feature four small holes. They typically measure between 5 to 7 millimeters in length and are paired with a stop bead. Despite being made of plastic, these bobber stops are quite flexible, which is handy when threading them through your fishing rod’s line guides and onto the reel’s spool.
The holes in these stops are spacious enough to accommodate lines with a test weight of up to 12 pounds without any difficulty.
Here’s how to use them:
- Thread the end of your fishing line through the first hole of the bobber stop.
- Weave the tag end in and out through the remaining two holes.
- Slide the stop bead onto your fishing line.
- Attach your slip bobber and tackle, and you’re ready to go. The 4-hole bobber stop stays tight on your line and can only be moved by sliding it up or down. Thanks to its design, it won’t slide down your line on its own.

How to Use a Dogbone Bobber Stop
The dogbone bobber stop is also made of plastic and comes with its own stop bead. Here’s how to use it:
- Run your fishing line through one of the holes in the dogbone stop.
- Twist your line around the dog bone 2-3 times.
- Run the end of your line through the second hole of the dog bone stop.
- Slide the stop bead onto your fishing line.

Twisting the line around the dogbone prevents the bobber stop from sliding down your fishing line when casting or reeling in. Congratulations, now you know how to use and rig up both types of bobber stops. Happy fishing!
3 Unique Ways of using Blobber Stoppers
The following are three unique ways of using blobber stoppers:
Lightweight Carolina Rig
A lightweight Carolina rig, also called a split-shot rig, is great for dragging bait over flats or through submerged vegetation. Unlike the usual Carolina rig for deeper waters, this lighter version uses a 1/4-ounce weight and a 12- to 18-inch leader.
You don’t need a swivel for this setup. Instead, thread a bobber stopper, then a VMC Tungsten Weight, and another bobber stopper onto the main line.
Add a 4/0 EWG hook, and you can easily adjust the leader length by sliding the bobber stoppers and weight along the line.
Plus, you can switch seamlessly from a Carolina rig to a lightweight Texas rig without redoing your setup.
However, be careful with heavier weights or lighter lines. Heavier weights might make the bobber stoppers slide during casting, and lighter lines may not grip the stoppers securely.
Make sure the bobber stopper size matches your line diameter. If not, using two stoppers on each side of the weight can help prevent slipping.
Line Tamer for Topwaters
Pro angler John Cox has a smart trick for preventing braided line from tangling in topwater bait props. He stacks two bobber stoppers snugly against the bait’s eye to keep the line rigid and avoid tangles.
This eliminates the need for a braid-to-monofilament leader, making setup simpler and reducing potential failure points.
Keep your Rods and Reels Ready To Rig
To keep your rods and reels ready to rig without tangles, use bobber stoppers or cork pieces. For rods with micro guides, slide a bobber stopper onto the tag end of the line and reel it up to the rod tip before storing in a Rod Glove.
For reels with smaller diameter guides, a combination of cork and bobber stoppers can secure the line effectively. This method minimizes line wastage and saves time by eliminating the need for rethreading, so your gear is always ready for action.
Life Without a Bobber Stopper
Before I started using a bobber stopper, I had to resort to a few different methods to reset my indicator after catching a few fish. (Don’t tell my girlfriend I hook up with fish.)
The most common technique involved using my arm’s wingspan as a measuring tool. Every time I caught a fish, I had to remeasure the depth, adjust the indicator, and cast again. This became quite time-consuming.
There were also instances where I tried marking the leader with a permanent marker, only to forget which line was set to the correct depth. It was inaccurate, to say the least.
And if I really wanted to waste time, I could reattach my forceps to the fly and redo the entire process of measuring the depth.
Life With a Bobber Stopper
Let’s imagine the scene.
We anchor down and crack open a beer. We determine our desired depth and set our strike indicator accordingly. Then, we slide our bobber stopper down the line, positioning it directly above the indicator.
We cast our line and eagerly watch for the indicator to drop. Boom! We set our hook and reel in the fish. After taking our Instagram-worthy photo, we release the fish back into the water.
To reset, we simply move our strike indicator below the bobber stopper’s position. Cast out again. Take another sip. Watch for that indicator to drop.
Final Words
A bobber stop or bobber stopper is a small piece of tackle that can be used in a variety of rigs and fishing situations.
A bobber stop allows you to easily adjust the depth of your bobber and can also peg your weight into certain positions making line management much easier.
I hope this quick bobber stopper guide has provided value to you and that it helps you understand what bobber stoppers are and how and when they should be used.

Meet Ibrahim Khan, an avid angler and author in Fishing Teach. He shares his wealth of knowledge from his 16 years of experiences in fishing. His articles are a captivating blend of practical insights and thrilling tales that invite readers into the enchanting world of fishing.
Ibrahim’s guides are your go-to guide in the realm of fishing on this informational site. Hailing from a coastal paradise, Ibrahim’s passion for angling is the heartbeat of his life.